What's up with this
banner thing?
If
you don't see a navigation bar on the left, CLICK HERE
|
|
|
May
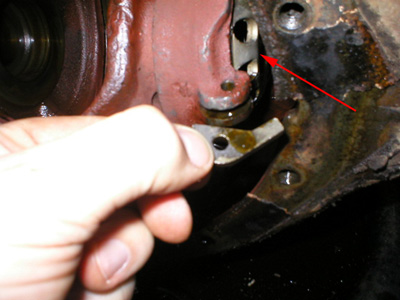
3, 2004 Rear Axle Disassembly Part 2Next I removed the bearing caps. Interestingly, all lash adjustments are done via threaded cups inserted in the ends of the bearing caps. They are held in place with small fingers that are secured by cotter pins.
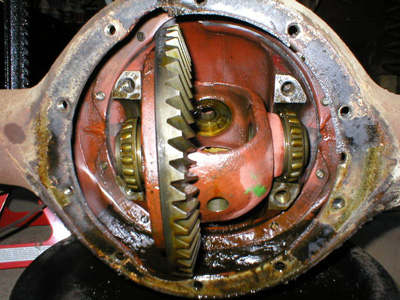
The carrier popped right out once the bearing caps were removed. The roller bearings are pressed on to the carrier, so I'll have to press them off later. Again, everything seems to be in excellent condition. I really feel lucky to have found such a well-preserved car. Nick Seybold tells me that he often sees beveled gearsets worn beyond recognition--glad I don't have one of those. Oh, and Nick also pointed out that the numbers on the ring gear indicate that I have a 3.90 gearset (the pinion and ring gear have 13 and 51 teeth respectively). I wonder if it would be worthwhile to install an NOS 3.60 gearset that I have available to me for a reasonable price. I'm leaning towards leaving it alone.
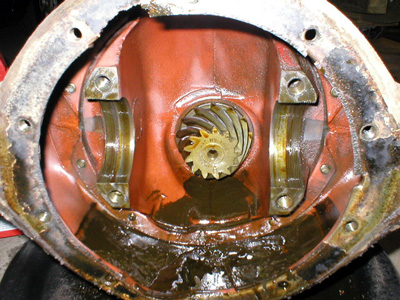
With the guts removed, I pulled the brake backing plates off the ends of the housing and removed the control arms from the rear spring perches, which are spot-welded to the axle housing. With that done, the last part to come off was the pinion housing and torque tube. The service manual is filled with warnings to not remove the torque tube from the pinion housing, and Nick reports that I'll get hurt if I try it, so I'm guessing that I'll just leave it as a complete assembly. I'll have to clean it by hand and paint it instead of powdercoating it, but I don't see a problem with that. But the housing and the control arms will join my pile of large items that will be going to the powdercoater's place in the next few weeks.
Back to Part 1 E-mail me at toolman8@sbcglobal.net This page accessed Thanks, Fidget! |