What's up with this
banner thing?
If
you don't see a navigation bar on the left, CLICK HERE
|
|
|
September
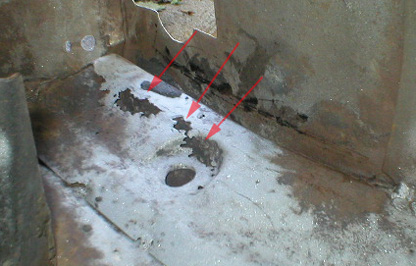
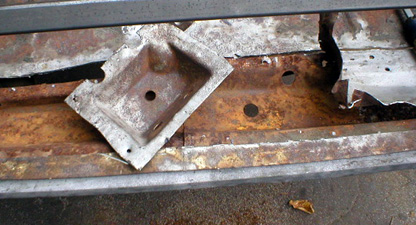
24, 2004 Trunk WorkI rolled the body out and did some sandblasting in the trunk area to get a better idea of what needs to be cut out and replaced. I was particularly concerned about the rearmost area where the floor meets the trunk opening as there was significant rust. The rear of the trunk is made from 3 separate stampings, and I wasn't really looking forward to removing and replicating all three. But until they were apart, there was no way to know what was in store. So I started blasting.
If you think that old-time bodymen who worked with lead instead of plastic filler were genuine craftsmen, let me be the first to disappoint you. A lot of the work on my car is beyond hack work with things roughly hammered into shape, sloppily welded patches and a thick coating of tar to hide the flaws and fill the holes. On the outside, they used about 1/4" of lead to get it smooth. Hack work at its worst. I also did some blasting on the outside of the quarter panels where I knew there was rust-through that would need new panels fabricated. I didn't want to blast too much of the shell since I'll only be working a few small sections. Once the floor is intact, I'll put it up on the rotisserie and send it off to be professionally blasted.
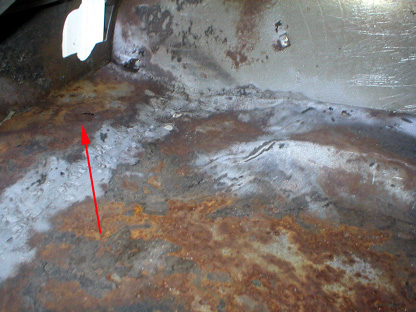
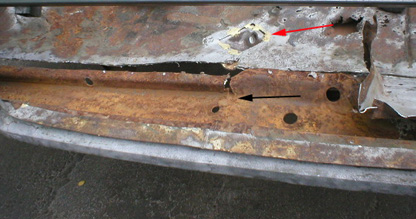
I started cutting along the welds that the old bodyman used to insert his hastily-crafted patch panels. He did a lap-joint between these new panels and the floor making it difficult to cut just one layer. I ultimately decided to just cut it all out since I would be replacing much of the trunk floor anyway. The thing I had to be careful of, however, was the stamping underneath, a part that was a tool tray on the 1940 Buicks and supported the rear sheetmetal. I was hopeful that this part was still intact--it looked pretty good from underneath, but there was no way to be sure until I could see the cavity inside where water could collect.
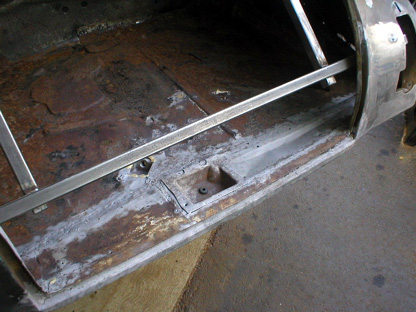
I'm optimistic that I'll be able to keep the existing inner panel--it's rusty, but I don't see any perforation or weak spots from above or below. That may be different on the passenger's side, but I won't know until tomorrow. But based on what I see here and from underneath, a good sandblasting plus a coat of Zero-Rust and it'll be ready to go another 60+ years. I also managed to remove the latch trough intact and will be reusing it after some minor metalwork to restore it to its original condition. It was just spot welded in place and popped off easily after grinding down some of the welds. The funny thing with some of these repairs is that they apparently chose to just weld all the seams despite the replacement panels they installed having pre-drilled holes in them for plug welds so it would look factory. Hacks.
Previous
Restoration Day E-mail me at toolman8@sbcglobal.net This page accessed Thanks, Fidget! |