What's up with this
banner thing?
If
you don't see a navigation bar on the left, CLICK HERE
|
|
|
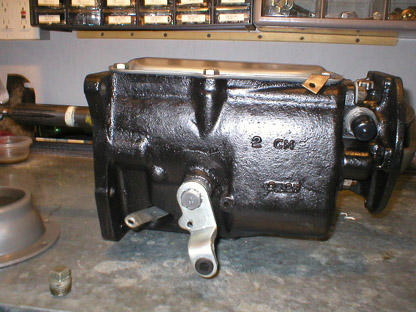
October
21, 2003 Transmission AssemblyI'm back. A lot has been going on, not the least of which was a new job for me. The right opportunity at the right place came along at the right time, so I took it. I'm now the Marketing Coordinator at Mustang Dynamometer here in Cleveland. It's a lot to learn, a lot to do, and a lot of excitement. Right now, I'm gearing up for a series of trade shows, including the SEMA show in Las Vegas early next month. It's great to be involved with the car stuff again, though this job will probably eat into my hobby time a little bit. If you need a dyno for tuning your car, use a Mustang dyno--they really are better, personal bias notwithstanding. Anyway, I finally got all the pieces I needed for reassembing my transmission. Everything was painted and ready to go, but I needed gaskets and seals, as well as all new bearings. As long as it was apart, there was no reason not to rebuild it completely, and I feel better now that it is done. Though it was an easy job overall, experience really makes a difference--I assembled and disassembled and reassembled the thing three times before I had the sequence right--if you don't do every step in order, it's impossible to finish the job. I'll show you my results here.
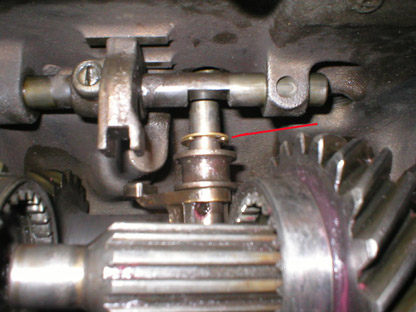
The first thing I did was install a new shift selector shaft seal, my second one actually, since I destroyed the first trying to install it on top of the original, which came apart and left the retaining ring inside the case (unbeknownst to me). Then I inserted the shaft, slipped the shift forks on, and secured them with E-clips. They were originally retained by a thick snap ring, but they are virtually impossible to find today, and I felt that the E-clips would be stronger and easier to work with. I used a pair to match the thickness of the original snap ring. It is very important, however, to remember to install the selector lever in the case before you install the shaft--I didn't, and it was responsible for one tear-down and reassembly.
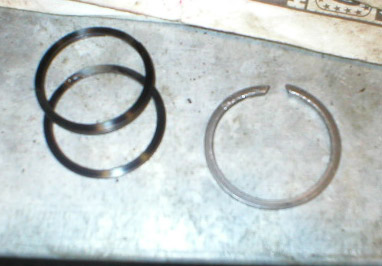
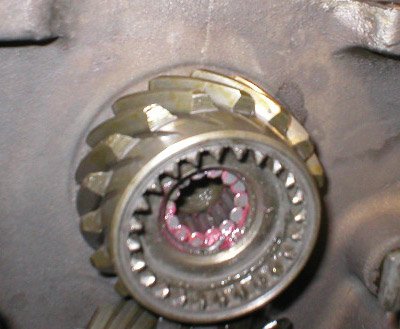
I also used modern spiral rings in place of a snap ring to retain the main gear cluster on the main shaft. I couldn't find a suitable replacement snap ring, and have a lot more faith in hardened spring steel spiral rings to do their job. They slid easily into place and held the gear securely. It may be a little tighter than stock, but it was hard to tell. I also replaced the roller bearings in the main input opening of the case. Again, make sure you do the bearings before installing the gears on the main shaft so you have some room to work (disassembly number two, reassembly number two).
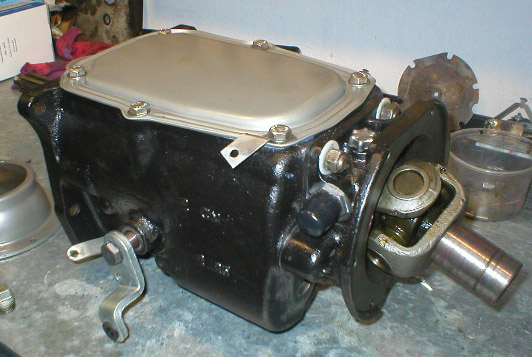
I used a lot of grease on every surface to help inhibit rust and to lubricate the parts as they go together. I plan to use synthetic oil in the transmission, so it should last a long time even under modern driving conditions. Together with the powdercoated case lid, torque ball housing and transmission mount, as well as the cad-plated shift parts and stainless fasteners, the transmission looks like new. Finally a finished assembly ready to go back into the chassis!
Previous
Restoration Day E-mail me at toolman8@sbcglobal.net This page accessed Thanks, Fidget! |