What's up with this
banner thing?
If
you don't see a navigation bar on the left, CLICK HERE
|
|
|
Amateur
Auto Restoration
Part Two: Getting Started & Disassembly So you finally found the
perfect project car and it’s sitting in the garage—now what? While disassembly really is
the first step of a restoration, how you take your car apart is critical to the
future quality of your restoration. I would argue that disassembly is one of the
most important stages of the restoration profess; done correctly, the
restoration will be orderly and perhaps even relaxing (which is why you’re
doing this, remember?) Done incorrectly, however, and you may just end up with a
pile of parts and no knowledge of what they are or where they go. I believe this
is often why you see half-finished projects for sale at fire-sale prices:
somebody’s enthusiasm overwhelmed their common sense and they simply don’t
know how to put the thing back together. Don’t let that happen to you! I use several techniques for
documenting the disassembly process:
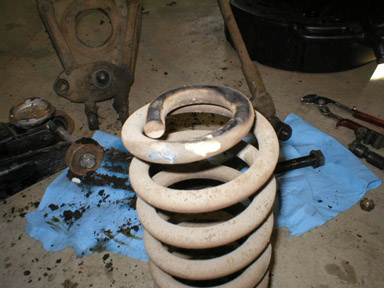
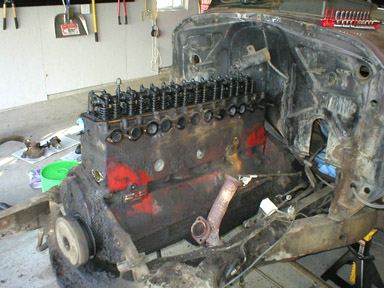
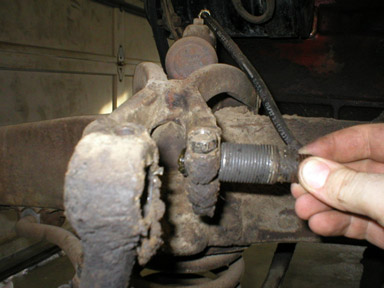
I started disassembly of my Century with the front sheet metal so I could access the hardware underneath: the front suspension, steering assembly and engine. I started by soaking all the nuts and bolts with penetrating oil in advance (broken bolts are a major-league headache, so avoid them when you can). Then I carefully removed each bolt and placed it in an old margarine tub to keep them all in one place until I could “tag and bag” them. I removed each piece of sheet metal in order, beginning with the hood, then the front bumper and grille, then the fenders, then inner fenders. Since I wasn’t going to be performing bodywork immediately, I stored the sheet metal in a safe place. I now had access to everything on the front of the chassis.
Of course, I ran into
problems—and you will, too—because of previous owners. For example, my
driver’s side front fender had been welded to the rocker panel and covered
with lead filler. Cutting it off was the only solution. Use care when facing
these situations! Examine the problem before picking up a tool, then proceed
slowly. If there is an old repair, you may not know why it was done or what’s
lurking underneath. Minimize the damage by being careful as you “undo”
someone else’s repairs, which may not be of professional quality. Disassembly
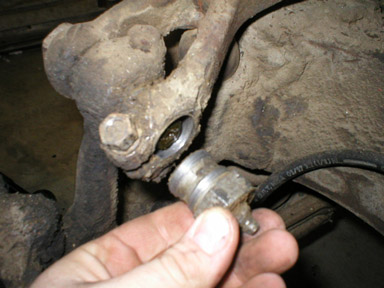
is not demolition! The front suspension components were the first parts I actually removed and refinished, following my procedure of restoring parts as they come off the car. The kingpins, A-arms, shock absorbers and sway bars all have their own unique mounting hardware, some of which are quite complicated. I took photos of each part as I removed it for future reference. Again, it isn’t always evident how something fits together if it’s been some time since you took it apart.
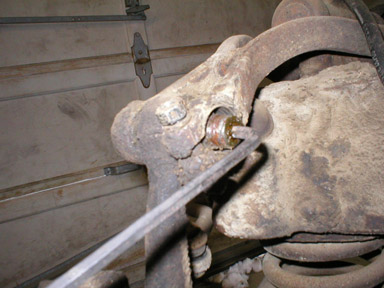
Broken bolts will happen,
too. These are very old fasteners made of very old steel and many have never
been removed. Don’t get caught up in the sound and fury of removing
parts—use care with every nut and bolt on the car. This isn’t necessarily
because you’re going to reuse them, but because getting half a bolt out of the
engine block is a big project in itself and not a very rewarding one at that.
Use lots of penetrating oil (I prefer PB Blaster, but you may have your
favorites, and no, WD-40 is not a penetrating oil), and if the bolt doesn’t want
to come loose on the first pull, don’t use a longer wrench or hammer—add
more oil, maybe some heat from a torch, and try again later. Come back tomorrow
when you're relaxed. Be patient. Most rusty old fasteners can be convinced to give up
their grip if you talk to them nicely instead of using brute force. To date,
I’ve only broken about a dozen bolts during the disassembly of the Century,
half of them on the rear fender where a previous mechanic welded them in. Of course, there are times
when you just can’t avoid shearing off the bolt head—it happens to the best
mechanics and restorers. So how do you get the broken bolt out of the part?
There are many different ways, and I’m sure many of you are familiar with
them: There’s the old vise-grip
routine, which only works about 0.001% of the time and only when there are
enough threads showing to get a good grip Usually you’ll just destroy the stub
and mar the surface around the bolt hole, and if you’re lucky, pinch your
fingers in the vise-grip’s mechanism. This is hack work at its finest. Then there are screw
extractors. These are like reverse drill bits, but are somewhat conical in
shape. You drill an appropriately sized hole through the broken fastener, then
insert the extractor and gently turn it counter-clockwise. The theory is that
the extractor will thread itself into the fastener, lock in place and act as an
extension you can use to unscrew the damaged portion. In reality, extractors are
made of a material which presumably fell to Earth from outer space and is harder
than any substance known to man, including drill bits. It’s also quite
brittle, so rather than unscrewing the broken fastener, the extractor tends to
immediately break off and become one with the bolt. Now you have no chance of
ever drilling out the fastener. A great technique that I
discovered by reading another restorer’s journal (www.thebugshop.org)
is probably the best I’ve ever found, provided you have access to the proper
tools: simply weld a nut onto the broken fastener and unscrew it. Even if there
are no threads showing above the part, you can place a similar-sized nut over
the broken bolt and weld it on. The heat of welding is usually sufficient to
break whatever chemical and mechanical bonds still exist between part and
fastener and it will often unscrew quite easily. In the next installment, I’ll discuss cleaning these parts you’re removing, from chemical soaks to sandblasting. E-mail me at toolman8@sbcglobal.net This page accessed Thanks, Fidget! |