What's up with this
banner thing?
If
you don't see a navigation bar on the left, CLICK HERE
|
|
|
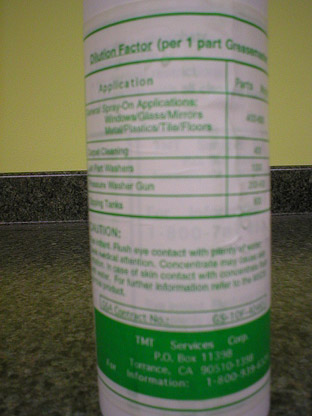
January 6, 2003 The Rusteco/GreaseMaster TestPART I First off, the guys who sold me the stove gave me the run-around all weekend, so I'm guessing that I'm out of luck getting any help from that angle. So I ordered a new baking element for my oven from Sears. $45.00! It should be here later this week, and I can finally start powdercoating some parts. I'm guessing that's the reason the oven doesn't get hot enough--the broiler element is doing all the work while the baking element stays stone cold. We'll see... On to today's project. Way ahead of schedule, my Rusteco and GreaseMaster arrived today. With nothing else to do, I thought I would take this opportunity to test the stuff and give you my impartial results. I'll admit up front that I really, really, REALLY want this stuff to work, but I'll provide you with my exact results here. Someone should benefit from this, right? I ordered the basic starter kit, which included two bottles of liquid Rusteco, which is for soaking or spraying, and one tub of the gel, which you spread on and work into the metal, then wipe off with a dry cloth. No water is involved. I also ordered a pint of GreaseMaster, which should be enough to get me pretty far into this project if the dilution proportions are correct. They also sent a pretty comprehensive CD for the computer that includes data sheets, testamonials, some articles, a few how-to videos, and a lot of other stuff. I guess it should for what the stuff costs (I spent more than $150 on the small portions I bought). I went through most of the information before I started, and I must say that it sounds impressive. Can it stand up to a real-world restorer's tests? Let's find out.
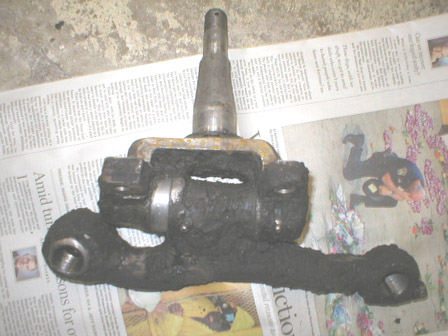
The first thing I did was mix up a batch of GreaseMaster. I dumped two capsful into my bucket and filled it with about 4 gallons of hot water. It foamed up quickly--a good sign of it's potency, I guess. Then I got the test piece--the right front spindle. This piece didn't benefit much from my pressure washing at the car wash, so I thought it would be the perfect candidate for this test. It's very greasy and dirty, and it needs to be clean before I can disassemble the kingpin. I don't really feel like working at it with a scraper and a wire brush. If this stuff works the way they claim, it should degrease itself overnight, leaving clean metal. They also say that I should be able to skim the grease off the top of the solution and use it again, so it's very economical. Call me skeptical anyway.
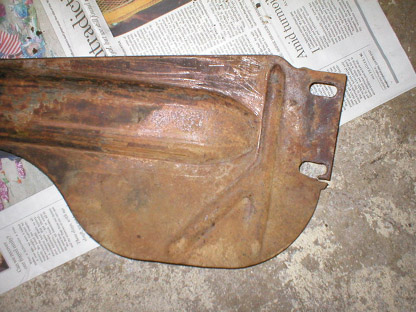
As I dropped the piece in there, just the foam pulled off some grease that I could see floating on top. That's a good sign. I'm going to let it sit for 24 hours, just like the TSP, and see what happens. I'll report back tomorrow on this process. Next, I opened up the Rusteco gel and decided that I would test it. I grabbed the front splash pan, which was pretty well degreased and scraped, but rusty. I don't want to sandblast any sheetmetal if I can avoid it, and de-rusting it with a chemical like this might help preserve the original contours. It'll also be better than hand sanding, putting it on the wire wheel or using some sort of rust converter or sealant paint. I'd rather start with fresh clean metal, and that's what Rusteco says it does. Let's go.
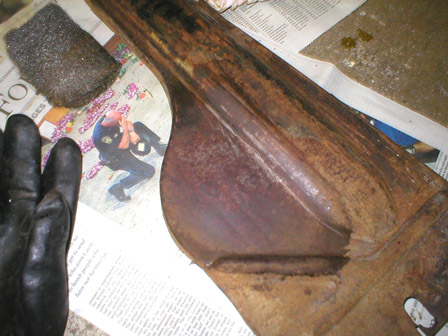
According to the instructions, you are supposed to rub the gel onto the metal with a heavy brush or scouring pad. I grabbed some steel wool and started scrubbing a small area. After doing that for a minute or two, I applied a second, thicker coat according to the instructions. Then I let it sit for 20-30 minutes. The instructions say to scrub it again after 20 minutes with a scouring pad or steel wool, then wipe it off with a clean cloth, which I did. The results weren't great. Crap! However, I am going to try again on a different part that has been properly degreased. I'm thinking that this part was still a little oily, and perhaps even had some paint on it (it was originally painted black), which is why it isn't clean metal. The directions clearly say that the Rusteco only affects rust, so if there's anything else on there, it won't work. I'm going to find a part that was not originally painted, degrease it with some brake cleaner, then try the Rusteco again. I'll have more details on that experiment tomorrow.
I'm also going to find a small part and soak it in the Rusteco liquid overnight, so I'll report back on the results of that experiment tomorrow, as well. I'm still holding out some hope that this stuff works as advertised and it was I who made the mistake in procedure. Previous Restoration Day E-mail me at toolman8@sbcglobal.net This page accessed Thanks, Fidget! |