What's up with this
banner thing?
If
you don't see a navigation bar on the left, CLICK HERE
|
|
|
January
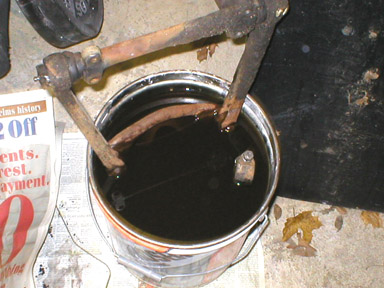
4, 2003 Front Suspension PrepSorry for no progress for a while, but I was involved in an accident on Thursday night where the weather caused the woman behind me so slide into the back of the Protege5 at about 20 MPH. Her car, a Saturn, was pretty well smashed, but I could detect no damage to my little Mazda. Paint chips from her bumper covered mine, but other than that, I don't even see a scratch. A tough little car! So, as promised a few days ago, I got started on the degreasing and cleaning of the front suspension parts. My GreaseMaster hasn't shown up yet (they say allow 3-6 weeks for delivery!), so I went up to the hardware store and bought some TSP (Tri-Sodium Phosphate--an industrial cleaner) to use while I waited. I filled a 5-gallon bucket with hot water and dumped in the appropriate amount of TSP. Then I tried my test piece--the left front radius arm.
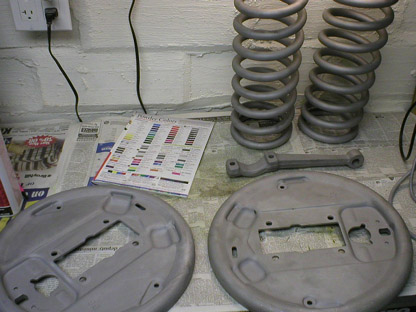
Well, the good news is that the TSP works. The bad news is that it takes a loooong time to do so. After soaking the part for 24 hours, I scrubbed it with a toothbrush to loosen the remaining grease and crud, then let it soak for another 24 hours. I kicked the bucket (ha!) every once in a while to agitate the solution a little bit. When I pulled it out today, the dirt and grease were pretty much gone. So it works, but slowly. I think boiling the solution for a while will increase it's efficiency--more on that below. With that part cleaned, I had to get the ball joint off. I tried hammering at it half-heartedly with my pickle fork, but I wasn't sure if the threads on the stud went all the way through. A quick E-mail to my pal Wayne cleared that up--it's a press-fit. So I put both radius arms in the vise and hammered away with the pickle fork. Both ball joints eventually popped off without any damage. Thanks again, Wayne! Then I scraped and cleaned the brake backing plates, which are too big to fit into my 5-gallon bucket of TSP. The grease came off pretty easily with the scraper and some acetone. Maybe my adventure at the car wash helped after all. So I threw the radius arm and both backing plates into the blaster and cleaned them up. No problem. They came out really nice. Again, I urge you to get a blast cabinet if you don't have one! I mixed up another batch of TSP and put in the left steering knuckle/upright assembly, the other radius arm and the lower half of the left A-arm. They're soaking in it right now (see photo above).
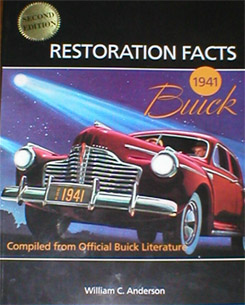
I had intended on powdercoating all these parts as soon as possible, but I'm an idiot. Last Monday, I bought a used electric oven through an ad in the newspaper. It was the cheapest one I could find, and they said they'd deliver it for free that evening at 7:00. Great! Well, after they showed up that night at about 10:30 and dumped it in the basement, I didn't feel like testing it. The next day (New Year's Eve), I put a 240V drop in the shop where I wanted to put the oven and plugged it in. Turning on the oven was a bust. It got warm, but not hot. I used an oven thermometer to determine that it maxxes out at about 300 degrees, no matter what the thermostat setting. That isn't nearly hot enough for the powdercoating, which requires a 450 degree spike, followed by a 400 degree cook. In addition, none of the burners work--I was hoping to use them to boil my TSP solution to speed the degreasing process. You just know Julia won't go for my boiling greasy car parts on her kitchen stove... The guys who sold me the oven offered a 6-month guarantee, but I'm not having much success getting them to come over and repair or exchange it (and I'm guessing I won't). Anyone know how to fix an electric oven that seems right but isn't? Drop me a line or I'm out $100. I guess that'll teach me. So I can't powdercoat until I fix the oven or get another one. I tried a practice run on an old wrench I had lying around, and put it in the toaster oven to cure. The powdercoating system really works well. Very cool. I'll have more pictures once I have the oven working properly and can powdercoat these parts properly. I also acquired a 1941 Buick Restoration Fact Book, written by Bill Anderson. He's a '41 Buick expert like Doug Seybold, and has restored many of them. The book is definitely worth the $39.95 cover price if you have a '41 Buick! Excellent piece of work, with all the information needed to make the restoration as accurate as possible. I spent some of today making a chart of suspension pieces and their required colors. I'm going to powdercoat everything, but many of the parts, such as the A-arms and shock arms, are supposed to be natural forged steel. I looked in the Eastwood catalog, and picked a color that is close to raw steel. Things like the master cylinder and the steering box are natural cast iron, so I'll order that color from Eastwood as well. The rest of the suspension items are 60% gloss black, which is Eastwood's Chassis Black, which I already have. The only snag I'm hitting is that the brake backing plates are supposed to be cadmium plated. I want to be original, but not to the point of losing durability, which is my primary goal. I may have them cad plated, then put clear powdercoat over them. We'll see...
So that's it. I'll (hopefully) be able to report back on how the powdercoating goes in my next installment. Stay tuned... Previous
Restoration Day E-mail me at toolman8@sbcglobal.net This page accessed Thanks, Fidget! |