What's up with this
banner thing?
If
you don't see a navigation bar on the left, CLICK HERE
|
|
|
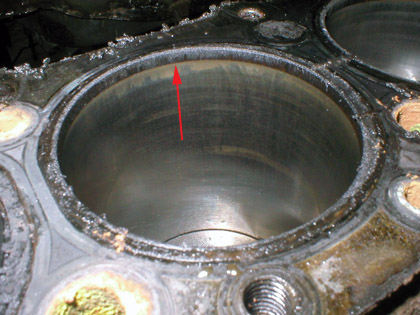
January 22, 2006 Disassembling the Engine (part 2)The block and bottom end of the engine were next, and again, there were no real surprises. The first thing I noticed was that each cylinder had a pretty significant ridge at the top of each bore, though the cylinder walls were in great shape with no gouges or scratches that I could see or feel. But because of that ridge, the cylinders will likely have to be overbored. I'll mic the bores and see how much we'll have to remove. Hopefully it will be no more than .020" or .030".
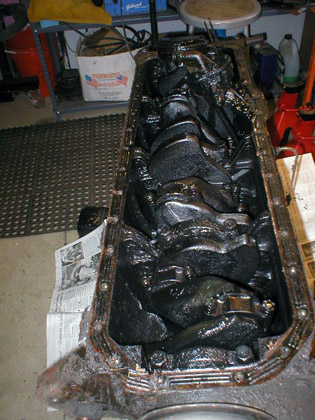
The bottom end was dirty, but in pretty good condition. The rods came out without any fighting, though pushing the pistons out past that ridge was a challenge I overcame using the handle of my hammer and some gentle taps. And that's one big crank!
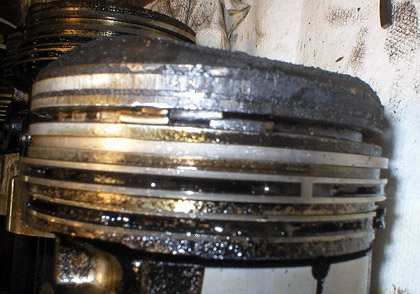
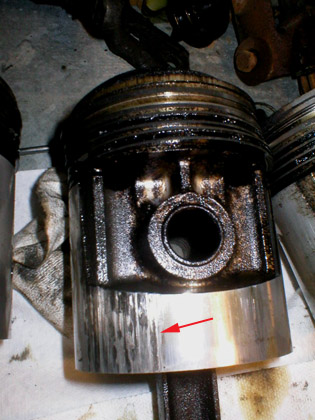
A few of the pistons had noticeable wear. Two had substantial scuffs on their skirts that must have been caused by lack of lubrication or debris in the oil, and one had a broken compression ring. Again, the pistons will be replaced with oversize units, so I'm not concerned. The cylinder walls of the block appear undamaged, but any imperfections will be removed when they're bored out.
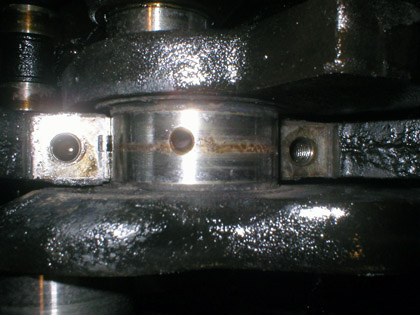
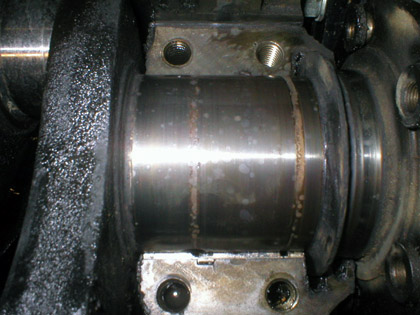
Once I had all the rods and pistons out, I removed the 5 main bearing caps. 1-4 were held in with two bolts, but #5 in the rear was held in with 4 bolts and holds the rear main seal. After some cleaning, I could see that both the rod and main journals have some noticeable wear that will have to be addressed in the machine shop. I'm going to have the mains and rods converted to insert-style bearings, so a set of undersize bearings will take care of any machining that the journals will require.
Before I pull the crank and cam, I need to get a larger puller for the crank pulley. I didn't want to risk damage using my undersized puller, so I'll pick one up tomorrow after work and try to get the front cover, timing chain, cam and crank out of the block. Then I'll do some quick measurements and work towards getting it to the machine shop later in the week. By then, I hope to have my shocks back and my order of rubber bushings from Steele Rubber, and I can start reassembling the chassis. I've sort-of got my eyes open for a 3.42 or 3.60 rear gearset, which I'd like to use in place of my standard 3.90 gears to give the car slightly longer legs on the highway. Anyone have any leads? Glad to be back! Back to Part 1 E-mail me at toolman8@sbcglobal.net This page accessed Thanks, Fidget! |