What's up with this
banner thing?
If
you don't see a navigation bar on the left, CLICK HERE
|
|
|
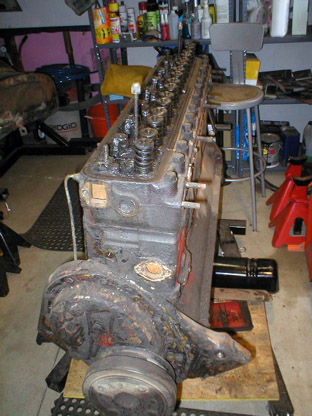
January 22, 2006 Disassembling the Engine (part 1)I'm back! Our Bedford house closed on Friday, I get the check on Tuesday, and all the work is done. I had a little party yesterday with some car buddies to watch all 10 hours of the Barrett-Jackson auction action Saturday afternoon, which was a great time. I sure missed the car world while that house was eating up all my time. But ultimately, that investment in time means that I now have the resources to finish the chassis, rebuild the engine and kick this project into high gear (finally!). I'm optimistic that things will start to happen quickly now. My current goal is to get the chassis reassembled by the end of February, the body sandblasted, the bottom painted and re-mounted on the chassis by spring. I'll spend the summer straightening and sanding the body and start aiming for a paint job next winter. Of course, along the way, there will surely be another investment house. This last one was so successful that I'm going to make a habit of it. This first one ate up a lot more time and resources than I expected, but was also probably a "worst case" scenario with every single aspect of the house needing restoration. Consider it a basket case. No house that I do in the future will be worse, I'm sure. Anyway, today I decided to get back to work in a BIG way: get started on rebuilding the engine. The first step is, of course, disassembly. I wanted to tear it down, see what the innards look like and make some initial decisions about what work it will require.
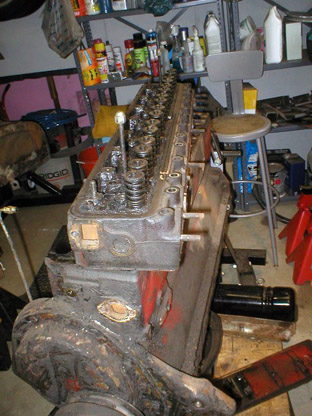
The first thing I did was remove the head. I broke the head bolts loose in the opposite order that they are tightened, working from the outsides towards the center, slowly relieving stress on the old iron. Once all the bolts were out, I gave it a few gentle taps with a dead-blow hammer to knock it loose and it came off easily. I managed to wrestle it onto the workbench without dropping it and had a look inside.
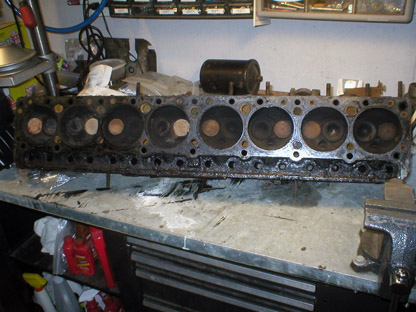
Inside, I found about what I expected. The coolant passages were pretty gunked up, there was a lot of oil sludge and the cylinders were heavy with carbon and oil. The valves looked pretty evenly discolored, so there don't seem to be any cylinders that were causing any trouble, but it was just worn out and neglected. No matter, since everything will be 100% new before it goes back together.
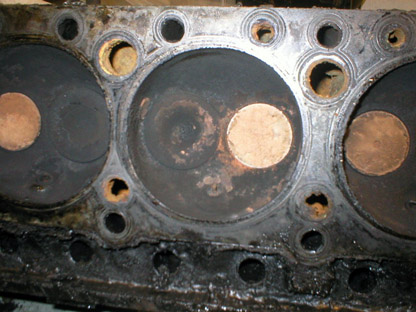
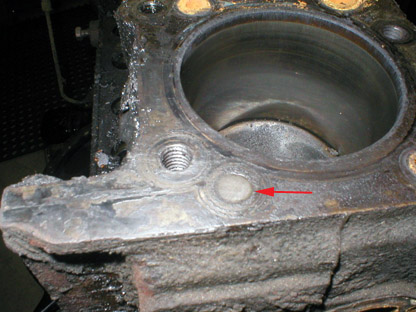
The deck surface of the block also looks pretty good. I didn't seen any obvious cracks or damage from overheating, but I'm still going to have the block, heads and manifolds magnafluxed to make sure. One item that jumped out at me was a coolant passage that looks to have been plugged. I don't know if this is original or something that happened sometime in the car's past. The head gasket has an opening here, as does the cylinder head, but the plug seems to have been perfectly fitted and machined to the deck surface. Anyone know? E-mail me.
Previous Restoration Day E-mail me at toolman8@sbcglobal.net This page accessed Thanks, Fidget! |