What's up with this
banner thing?
If
you don't see a navigation bar on the left, CLICK HERE
|
|
|
January
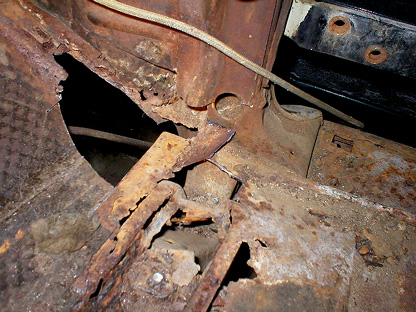
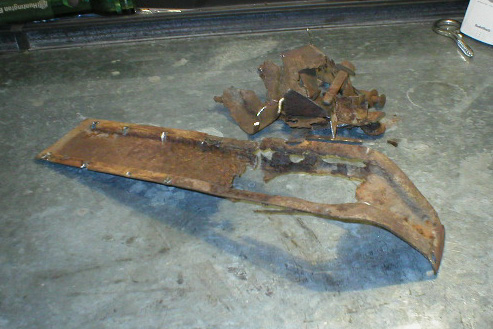
28, 2004 SurgeryWell, I finally did it--I started cutting my car. I attacked the rusty floorboards on the passenger's side tonight and made some good progress. It actually turns out that things aren't quite as bad as they seemed initially. I managed to make some straight cuts while not removing anything that was structurally necessary (except the body braces; more on that below). Welding in new metal should be fairly easy. The hard part will be rebuilding the body braces.
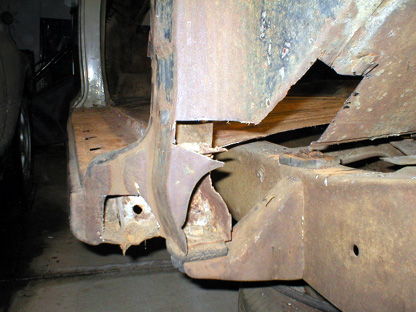
My plan was to make as many straight cuts as possible so the patch panels would be easy to fit. Using a combination of the Sawz-all and the cut-off wheel, I trimmed the sheetmetal without damaging any frame parts underneath. After a few cuts, I was able to see exactly how the entire floor was held together. There is a lap joing running across the floor right about where the bottom of the hole I cut above, a body brace that extends to the forward body mount and a body brace that sandwiches the floor along with the upper brace that was ruined. You can see the remains of the bottom body mount in the photo below.
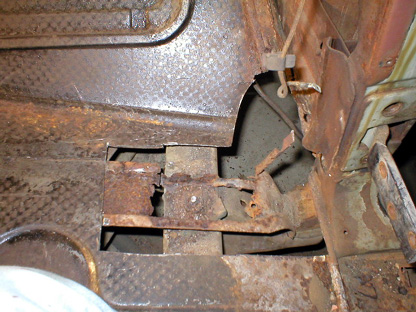
I moved to the front edge of the floorboards, the areas that join the front fender and the firewall. There was some light perforation here and some more significant rust around the fender mount. I cut out as little as possible since these are cosmetic areas (sort of, anyway), and again tried to make shapes that would be easy to duplicate.
This was a project that was a little intimidating to me, but when I just decided to do it, took some time to look at how things were held together and started cutting, it turned a big project into a small one. The clean cuts actually make the area look better than the rusty metal, and gave me a lot of confidence in my ability to make proper and lasting repairs. It feels really good to have this repair underway, the very part of this restoration that I dreaded most. It kind of shrinks it down to size in the grand scheme of things. Previous
Restoration Day E-mail me at toolman8@sbcglobal.net This page accessed Thanks, Fidget! |