What's up with this
banner thing?
If
you don't see a navigation bar on the left, CLICK HERE
|
|
|
February
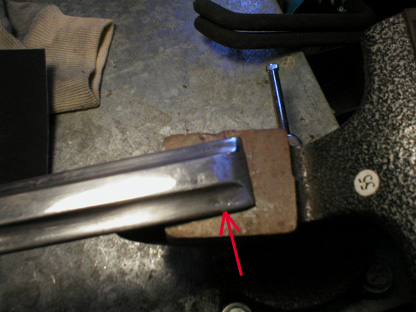
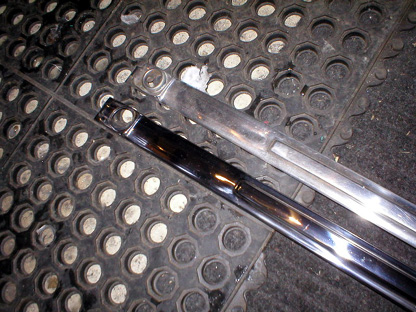
8, 2004 Stainless Trim RestorationNow that I have my buffing stand finished, I wanted to try it out. I've done buffing in the past, so I have a good idea of what's involved, but I thought I would share some tips and some results with you. I started with the trim that runs along the beltline and intersects the door handle. The leading edges of these pieces are usually chewed up because the rear edge of the hood, when open, sometimes crashes into it when somebody opens the door. I have four of these, having acquired a decent pair of spares, so it will be good practice and won't really matter if I ruin a piece, though it's pretty hard to ruin stainless. This particular piece had a small crease and a dimple in it right at the leading edge. I had to fix both of these before I could start buffing. The dimple was easy to tap out with a small hammer and a punch about the same size as the dimple. Tap lightly a few times, check your progress, do it again until the dimple is gone. You can check progress by running a file across the area (lightly!) and looking for low spots. This is the same technique body men use to check the straightness of body panels, though they use black paint to spot the low spots. The picture below shows the crease area (arrow). I forgot to take a picture of the crease before I started, but this is about halfway through tapping it out. The dimple was in the same location on the other side of the raised center section. I used many light taps instead of trying to blast it out in one fell swoop. It takes time to do things right.
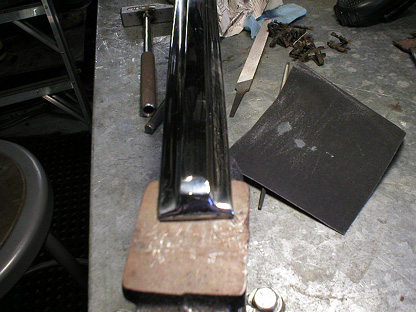
Once I was fairly certain that I had
the crease straightened, I ran my round file over the area to double check, then sanded it
lightly with some 400 grit sandpaper to knock it flat. Satisfied with the results, I put
it on the wheel and started polishing. I'm using a combination of Eastwood
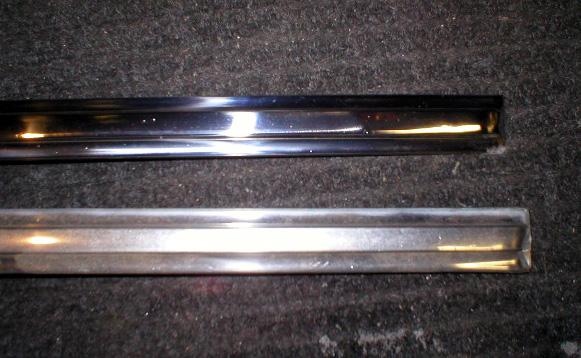
I buffed the whole piece first with the black compound on spiral-sewn wheels. I have to say that I'm really impressed with what a great job the Eastwood stuff does on the stainless. Their fast cutting compound really cleans the stainless effectively, and following up with the stainless-only compound on a spiral-sewn wheel really makes it glow! You can see the difference between a rough polished part (black compounding only, no green spiral or green loose buff brightening, which I'll do later) and an original part below:
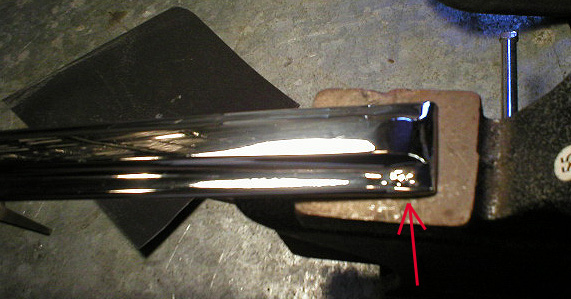
One more thing: even though it is metal being buffed by cotton and you're supposed to use firm, but not excessive pressure, heat can build up quickly. Sometimes you won't feel the heat building up (usually as the result of an edge being the only contact point on the wheel), and it can get out of control. Since I promised to show you everything I do, here's my mistake of the day:
One other thing: buffing is MESSY! It generates a lot of dust and the buffing wheels come apart as you use them, making a lot of fine stringy clumps of cotton. I spent about a half hour cleaning up the shop when I was done. Not fun. If you're going to try this yourself (and there's no reason not to--it's easy!), make sure you have the proper safety equipment including a full-face shield and some sort of respirator so you don't breathe the fine dust laden with metal particles. A pair of thick gloves will also protect your hands if you accidentally slip off the wheel (easy to do) and from the heat of the part you're buffing. Previous Restoration
Day E-mail me at toolman8@sbcglobal.net This page accessed Thanks, Fidget! |