What's up with this
banner thing?
If
you don't see a navigation bar on the left, CLICK HERE
|
|
|
February
14, 2004 Floor RepairWe're moving faster now. I finished my bracket and got started on patching the floor pans. The bracket took some work to finish because the weld I used to build-up the corners so I could make nice round edges was REALLY tough to grind down. But with some aggressive tools and some patience, the bracket turned out very nicely.
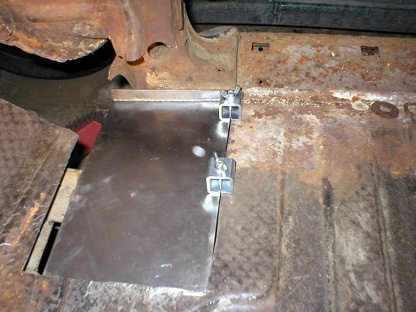
Satisfied that my bracket was as good as I could make it, I turned to the next step, which is patching the floor itself. I'm going to wait until the body is off the frame to install the bracket, since it will take some creative welding to get it in there and I didn't have access from above. My first step in making a loor patch was to test fit a blank sheet of 16-gauge steel and figure out where to cut and bend it. I rough cut it to size and did some test fitting. With some filing and grinding, I was able to get it to fit pretty well overall. You'll notice in the photos below that this piece of the floor is overlapped with the piece that makes the firewall using a lap joint. I don't like lap joints because they are breeding grounds for rust, but that's the way the factory did it, so I'll duplicate it. My first piece patches the flat floor above the replacement bracket's location. This piece also ties into the door sills at a rounded lip, so I made my patch panel with a rounded edge to meet the original sheet metal.
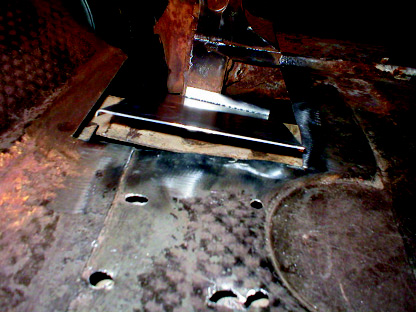
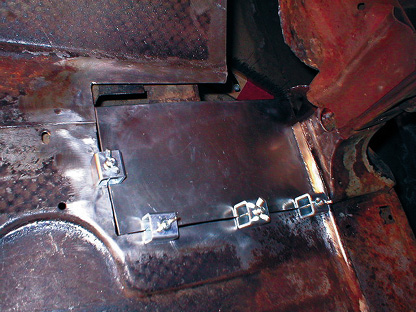
Satisfied that my panel fit was decent, I clamped it in place and tack welded the edges. It took some playing around with my welder settings to get a decent weld that didn't burn through the sheet metal itself.
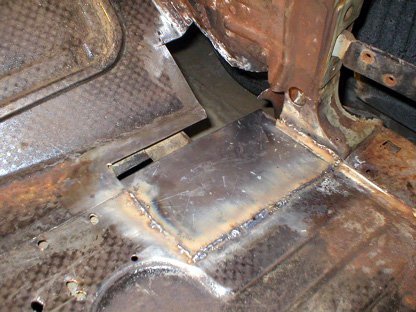
The next step will be a small patch inside the post, then the final piece of the toeboard, and finally the bracket once I have the body off the frame and can flip it over and sandblast the body mounts. Sunday I'm off to Indianapolis for a motorcycle show (work, not shopping), and I probably won't get a chance to work on the car again until the middle of next week. Stay tuned... Previous
Restoration Day E-mail me at toolman8@sbcglobal.net This page accessed Thanks, Fidget! |