What's up with this
banner thing?
If
you don't see a navigation bar on the left, CLICK HERE
|
|
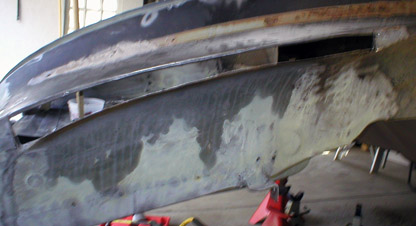
April 17, 2005 Quarter Panel PatchingToday I wanted to do something other than chase rust holes in the trunk floor, so I decided to repair one of the biggest issues facing me, and a job I've been putting off for a while: the passenger's side quarter panel where the fender bolts on. Both the inner fender and the outer edge of the quarter panel that folds over it were rusted through in multiple places. What a mess! So today I cut it all out.
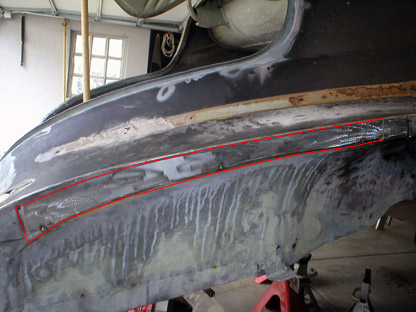
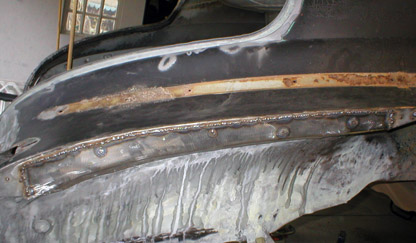
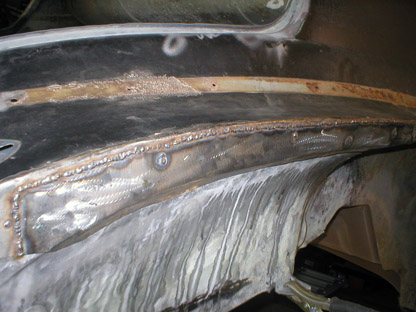
This particular area of the body is a sandwich of the inner and outer panels spot-welded together. The outer panel curves over the inner panel, forming a flat flange to which the rear fenders are bolted. I made a patch for the inner fender first, making sure to cut a clean radius along the top edge, as it may be visible from inside the trunk. It's important to be neat and authentic-looking. Once I was satisfied with the panel's fit, I welded it in place. Then I ground down the weld seam until I felt it would not interfere with the outer panel. I didn't worry too much about making it perfect (though it was darned good!) because it would be hidden by the outer panel.
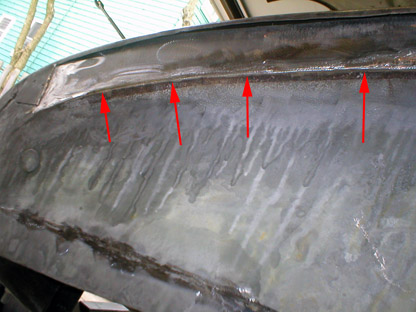
Then I made the outer panel, which was very challenging. Not only was it critical to have a good fit so the weld would be strong and easy to hide, the folded lip had to fit tightly to the inner fender. Since it is curved, it tends to curve the panel as it curls under, so I had to stretch the metal to get it to fit. I added 1/2" to the patch that would become the folded portion, then carefully hammered a slight fold into it using my trusty bench vise with a body dolly chucked into it. Once it was close, I tacked one end of the patch into place. Of course, after hammering the fold into the metal, it wasn't flat any more and tended to curve away from the body (sorry I don't have more photos, but I was "in the zone" and didn't stop often enough to take them). So I moved along the seam, holding it flush with the body, tacking it, then moving to the next one. Eventually it was nice and flat and pretty close to the right shape.
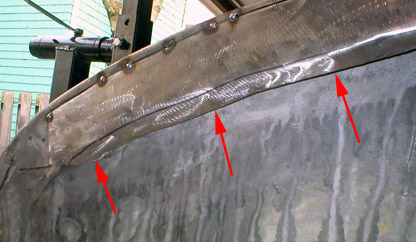
To get the folded edge to fit more closely to the inner fender, I simply took a hammer and my "comma" dolly and hammered it flat. It fit very nicely once it was all said and done.
With some grinding, the repair should be virtually undetectable. I'll use the fender to re-drill the mounting holes and add the blind nuts to the inner panels later. One of the worst repairs turned out to be a pleasurable way to spend an afternoon and my best patch yet.
Previous Restoration Day E-mail me at toolman8@sbcglobal.net This page accessed Thanks, Fidget! |