What's up with this
banner thing?
If
you don't see a navigation bar on the left, CLICK HERE
|
|
|
May
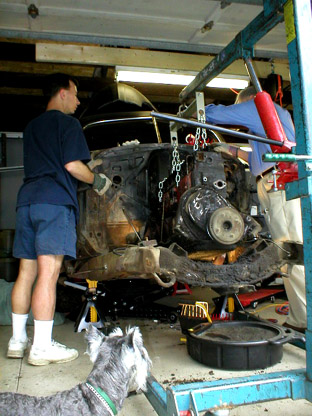
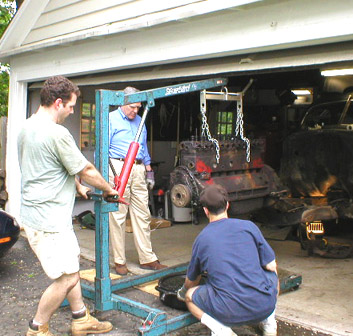
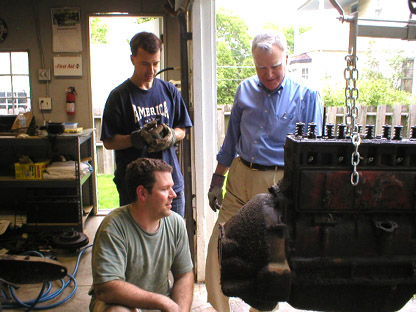
10, 2003 Engine Removal (part I)First, a big THANK YOU! to my father, Peter, and friend and co-worker, Andy Straka (the famous author--seriously, look him up!). Without them, I couldn't have removed this beast today. I'd also like to thank my wife, Julia, for acting as photographer this afternoon so I could document the procedure. The day started out ominously, as storms have been ripping through our neighborhood all week. But the weather cleared for us all day, and it wasn't a problem. Then I went to the tool rental store to pick up a cherry-picker and was informed that it was broken. They were going to try to find me another one, but by then, it was after noon, and I had to get started, so I called another store. They had one, but no load leveler, so I bought one of those, brought everything home in Andy's F150 and we got started. I decided to use the head bolts to remove the engine. They were probably plenty strong and screwed into the block, not the head itself, so it would minimize the chance of damage to any castings. Unfortunately, the head bolts were too short to screw into the block once the chain was attached. Andy and I made our first trip to the hardware store for washers and longer 7/16-14 bolts. With the new bolts, it was simple to attach the load leveler. My father showed up about then, and we got to work. I put Andy in charge of removing the front engine mount bolts while I worked on the rear engine mount and transmission mount.
Once we had all the mounts released, we tried removing the engine and transmission as a unit. Nick Seybold had warned us that getting the torque ball separated from the rear of the transmission can be a pain sometimes. I had hoped that mine was one of the easy ones, but it was not to be. We wrestled, I unbolted 5 bolts holding the torque tube to the back of the transmission, but it just wouldn't let go. So I decided to remove the transmission from the engine and pull the engine by itself. The bolts were a little hard to reach, but with persistence, I got all six of them. There was so much greasy crud on the transmission that two of the bolts were hard to find and we tried pulling before we found all of them. Once the transmission was detached, the engine came right out. Easy!
The next step was getting the engine onto the stand. That meant removing the bellhousing, clutch and flywheel. I figured it was like any car, and unbolted the bellhousing from the block. All six bolts came right out without a fight. Unfortunately, the flywheel is a lot bigger than the opening on the front of the bellhousing, unlike on a modern car. Then I noticed that there was a sheetmetal tray on the bottom of the flywheel, and figured that we could remove it and slide the bellhousing up and off the flywheel. Andy and I set to work removing the bolts holding the sheetmetal tray on. The bolts were hard to find, being buried under up to an inch of hardened grease and mud. For future reference, there are FOUR bolts, not THREE! Don't pry on it until you're sure they're all out.
Previous
Restoration Day E-mail me at toolman8@sbcglobal.net This page accessed Thanks, Fidget! |