What's up with this
banner thing?
If
you don't see a navigation bar on the left, CLICK HERE
|
|
|
May
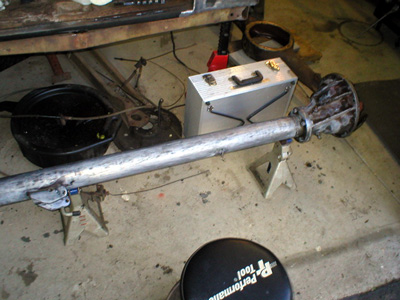
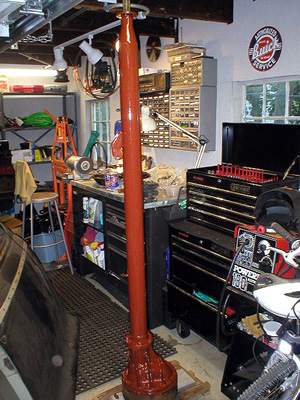
19, 2004 Painting the Torque TubeI ordered some 18 and 20 gauge sheet metal at work today (nice to work at a machine shop where we order A LOT of steel), so I'll be able to start patching and repair the trunk area very soon. That should be the last project before the body comes off the frame and I can finally start putting things back together rather than taking them apart. I'm really looking forward to reassembling the chassis, which, to me, is the most interesting part of a car. Perhaps I'll take just the chassis to a show or two before it's all done. Speaking of reassembling the chassis, I painted the first coat of Zero-Rust on the torque tube and pinion housing this evening. I spent about two hours on Sunday finishing the stripping process, but didn't take any pictures because I didn't really do anything interesting or worth showing you. I basically just used a combination of wire wheels, abrasive discs and Scotch-Brite pads on my die grinder and just worked away at it. Easy and no need to disassemble the torque tube housing, which apparently is a big no-no. Tonight I wiped the entire housing down with Picklex-20 to dissolve any remaining micro rust (and there was definitely stuff my wire wheels couldn't get), dried it thoroughly and prepped it for paint. I considered painting it on the jack stands, but that would involve moving it around or painting it in stages and the chances of ruining the wet paint job would increase dramatically. In stead, I mounted the pinion housing back into the rear axle housing and stood it upright on a few boards to space it off the floor. This way I had 100% access to all sides of the torque tube and it wouldn't lay down and risk getting damaged while the paint is drying.
With the torque tube properly secured, I started painting. Like I did with the door, I started with the orange Zero-Rust which will be followed by a finish coat of black. Using two colors ensures that I don't miss any spots during the second coat. I also like the fact that I'm using orange followed by black, which is apparently how it was done originally. If, someday in the distant future, some auto archeologist starts examining this Buick, they'll have the same original-type clues to work from that I did. Nobody will ever see this, but I kind of like the idea that even underneath, it's as accurate as I can make it. I'm weird that way, I guess. The paint went on easily with a brush. I'll probably spray the finish coat to get it nice and smooth, but the base coat can be brushed on because I'll be sanding it slightly to get a smooth finish and eliminate dust nibs and runs. I also didn't feel like cleaning up the paint gun twice for this project. It's such a pain that I figured only the final coat is valuable enough to justify it.
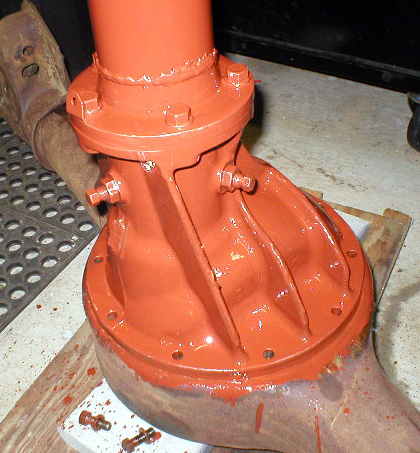
I thinned the Zero-Rust somewhat so that it would flow out nicely and get into the cracks where I can't reach with a brush. It turned out rather well, though it was difficult to get the paint to stick to corners, as you can sort-of see in the photo above--look at the reinforcing ribs on the pinion housing and see that they are still kind of dark, not bright orange. The paint doesn't want to cling to edges. It won't matter, though, since the black will cover it thoroughly because I won't thin it as much.
As soon as this first coat is dry, I'll spray the second coat using the HVLP gun that Julia bought me for Christmas. I'll show you how that works, hopefully in the next installment.
Previous
Restoration Day E-mail me at toolman8@sbcglobal.net This page accessed Thanks, Fidget! |