What's up with this
banner thing?
If
you don't see a navigation bar on the left, CLICK HERE
|
|
|
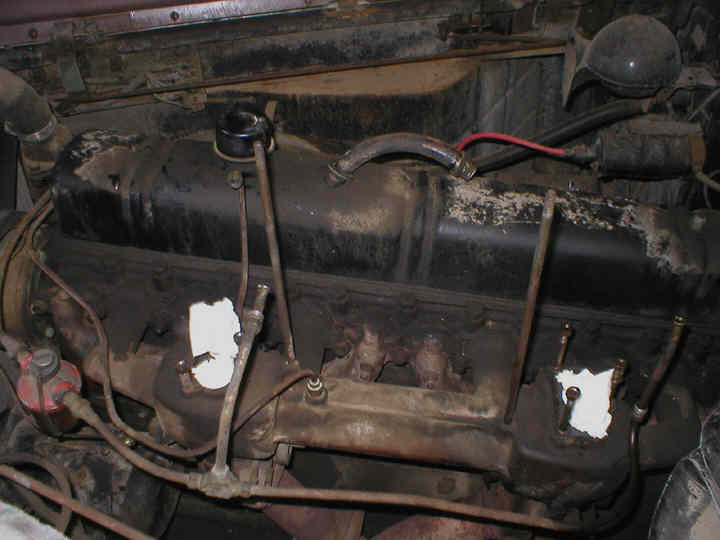
June 30, 2002 Some ProgressWell, now that my shop is in order, I have finally started taking the Buick apart. The first order of business was to pull the carburetors and get them rebuilt. When I pulled them, I found puddled fuel in the manifold under the front (primary) carburetor, so I know that's the source of my stumbling problems--the accelerator pump was literally flooding the engine every time I tipped into the throttle. I found Jerry Mong, who rebuilds old carburetors (The Carburetor Shop, 3575 Poe Rd, Medina, OH 44256 (330) 723-2162), and dropped them off for him yesterday. I was originally going to try to rebuild these old Strombergs myself, but after reviewing the procedures in the manual, I decided that it was better left to the professionals. I have a lot of experience in EFI, but the delicate little pieces of a carburetor, especially two so old, was a little intimidating. And the mechanisms they used to regulate the choke, warm and cold idle, and other basic functions look like the inside of a Swiss watch--incredibly complex. Besides, this way I'll know that they'll work right, and the price is quite reasonable. Here's what the engine looks like without it's carbs and air cleaner (those are paper towels stuck in the intake to prevent debris from falling in):
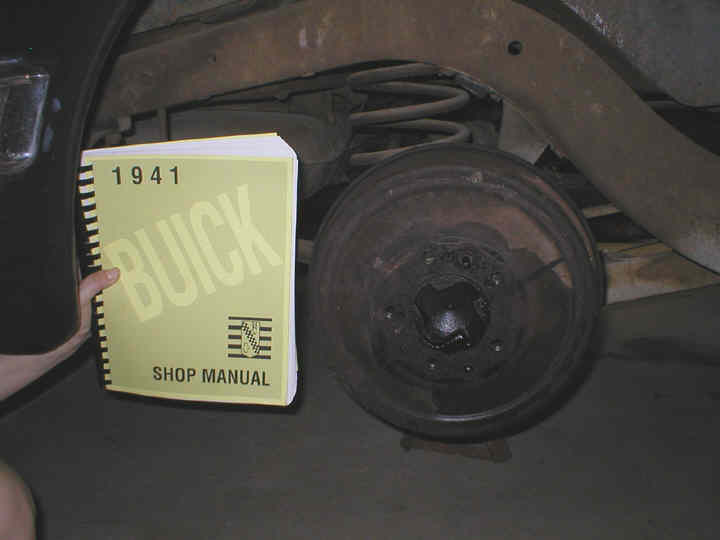
I also started examining the brakes and trying to determine the best plan of attack for getting this car back on the road. The first order of business was getting the car up in the air. Believe me, this is easier said than done. My 3.5 ton floor jack had a hard time lifting the rear end of the Buick so I could get jackstands under it. At 4200 pounds, it isn't a lightweight. I'm glad I invested in a set of 4 12,000 lb. capacity jack stands. Once it was up in the air, I pulled the wheels and crept around underneath. I'm amazed by how modern many of the components are. It uses a fairly rudimentary torque arm and panhard rod for the rear suspension, something that is an aftermarket upgrade on a newer car like my Mustang. It also uses a torque tube for the driveshaft, something that has only recently come back into use on the C5 Corvette. I saw some signs of deterioration in the rear brake hoses (although the fronts seem brand new), so I'll be replacing those when I do the rest of the brakes. Speaking of brakes, these drums are HUGE! Check out the photo below (the manual is standard 8.5"x11"):
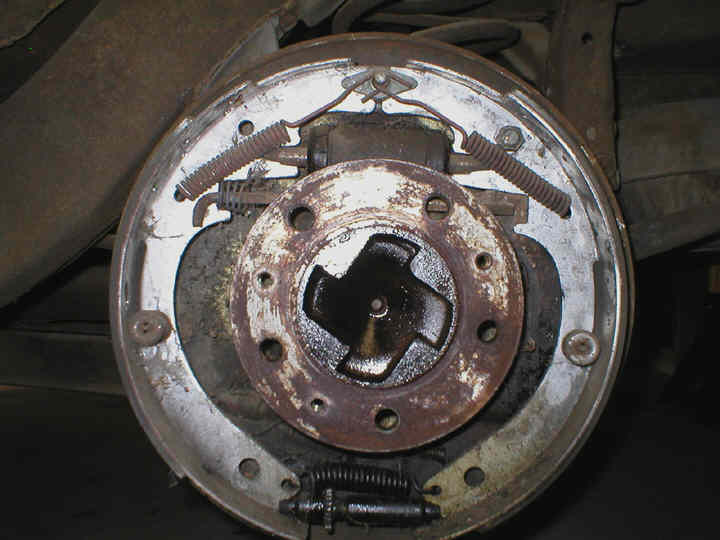
I had a heck of a time getting those rear drums off, but with a little patience, some WD-40 and a pry bar, the rust on the hubs eventually gave up its grip on the iron. Here's what I found:
Everything is there, but before I put this on the road, I'm going to replace everything, including the wheel cylinders. I don't want to take any chances with brakes. As with all my previous projects, I strongly believe that good brakes are a requirement, not optional. Fortunately, the rebuild kits are inexpensive. I'm also going to replace all the brake lines with stainless to guarantee no problems down the line. The front brakes are another story. I wasn't able to get the front drums off. They appear to be identical to the rear drums, but they are seated on a conical bearing retainer that attaches to the front spindle, and appear to be rivited to the hub. If they are like a modern car (my Mustang, for instance), the bearings are integral with the drum, and they are all removed as a unit. I don't have a wrench large enough to remove the locknut on the spindle, so I'll buy one tomorrow after work and pull the whole assembly off the spindle. This will give me a chance to replace the bearings and seals as well. Unfortunately, the service manual is rather vague about how to remove the drums. In all cases, it simply says, "Remove front drums and hubs." No procedure or indication as to whether they are one or two pieces. With Seybold out of town for another two weeks, I guess I'll just have to try it myself. I'm sure there's nothing I haven't seen before. Previous
Restoration Day E-mail me at toolman8@sbcglobal.net This page accessed Thanks, Fidget!
|