What's up with this
banner thing?
If
you don't see a navigation bar on the left, CLICK HERE
|
|
|
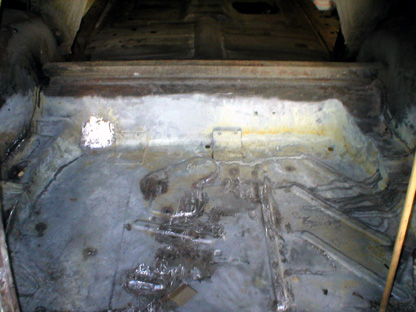
July 21, 2005 The Trunk is DoneThe headline is no joke, I have finally finished repairing the trunk. It isn't perfect and may need a little touching up here and there, but for the most part, it is again solid and un-perforated. The last bit was to grind and touch up the seam between the inner fender and the trunk floor where I used my "sculpting" technique to make a rounded corner in the metal. As I said, there may be some additional work in the near future to practice lead-loading and smoothing the metal, but I'm moving on to another part of the car now.
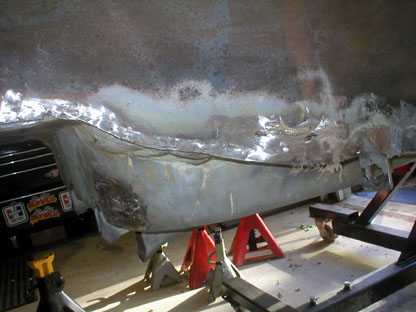
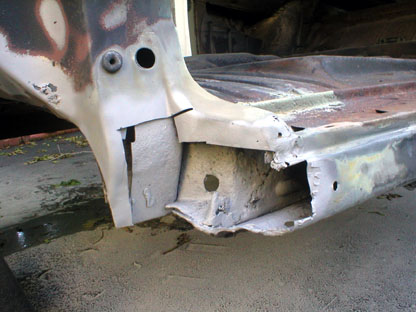
I decided that the next areas requiring immediate attention are the front body mounts where the front fenders bolt on. Both sides are badly rusted, though I already cut open the passenger's side when I was repairing the floor on that side last year. I left it open in hopes that I could sandblast the inside of the rocker panel, and it looks like I'll be doing the same on the driver's side.
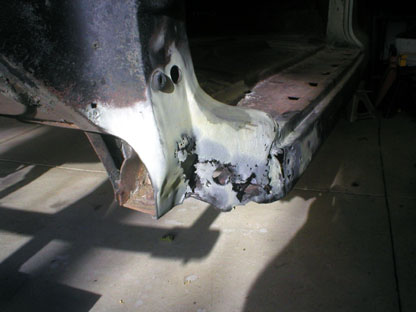
The first thing I did on the driver's side was to make a paper template of the area so I could make a new patch panel. I think it will only take one piece if I'm good, and no more than two if I'm not. Then I cut away the rusted and damaged areas to get a good look at what was underneath. Like most cars of this era, the Buicks used folded and layered sheet metal for reinforced areas like this one. The good news is that it was strong and light. The bad news, of course, was that it rusted instantly.
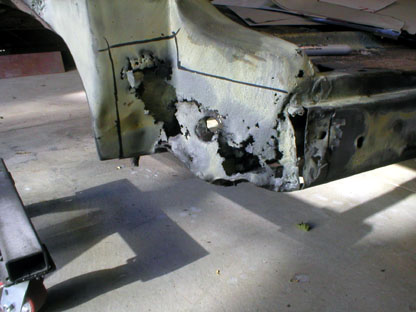
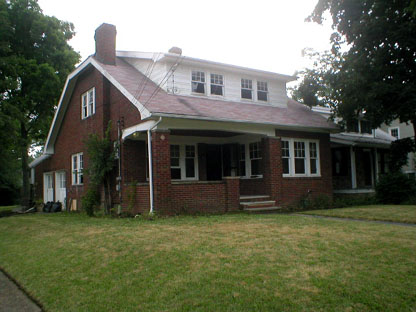
The inside of my driver's side rocker panel, as I expected, was full of rust, dirt and broken glass. I blew it out and found that the metal was pretty solid, but not solid enough to just repair the exterior and call it done. So I hauled out my sandblaster and hit the area I would be working on one more time. The pressurized sandblaster, while messy, does a great job in a fraction of the time that the cheap siphon version would have. But I realized at this point that if I were really going to make all these repairs, it was probably foolhardy to try to sandblast this entire car myself. Between the mess, the noise and the sheer quantity of sheet metal that needs attention, I've decided to send the body shell out to be sandblasted as soon as possible. I haven't found another blaster locally, but that doesn't mean there aren't any. I'll let you know what I find. I'm hopeful that they will be able to just shove the blast hoses down the rocker panels through the holes I've cut and clean out the inner rockers. Then I can prime them and cover them with Wurth Body Wax and never worry about it again. * * * And for those of you wondering what I've been doing all these weeks, I've been breaking my back on the new house. So far we have the exterior pretty well cleaned up, and I'm going to start painting the exterior trim tomorrow (Friday) night after work. The good news is that the house is mostly brick, so there won't be much painting. The bad news is that the exterior wood on the house is in about the same condition as the sheet metal in the rocker panels of my Buick—sort of solid, but needing a lot of TLC. I replaced the fascia boards behind all the gutters and will be painting those first so I can reinstall the gutters. Then I'll paint everything else. We still haven't decided if we are going to replace all the windows or just those that need it most—I am, after all, in this to make money. But if it takes a lot of time to repair a window, plus buying a new storm/screen for it, I may be better off in the long run just replacing it. The nice wood ones on the first floor, which are natural wood, could get expensive. Vinyl just wouldn't look right down there. I'll post photos here as the house evolves and keep you informed of what I'm doing. We'll eventually have a web site for the house for marketing purposes, and I'll provide a link once it is up and running. It won't be as detailed as this site, but you can take the virtual tour and if you live in Cleveland, it'll be a nice little house in the better section of Bedford, ready to move-in. Best of all, Julia and I have decided that Thursday nights will be the nights that I mow the lawn at our primary residence, then I can use the rest of the night to work on the Buick. I'll be able to put in at least one day a week on the car project—I don't want to fall too far behind. Each Friday, I'll try to give you something to read, I promise! Please hang in here with me. Things will get interesting after we sell this house. A portion of the proceeds have already been earmarked for rebuilding the Buick's engine this winter. The house after that will pay for paint, and the one after that will pay for the interior. And once I'm there, I'm hoping to leave my day job and renovate houses full-time. You'll see it all happen here, for better or for worse, so please keep checking in from time to time.
Previous
Restoration Day E-mail me at toolman8@sbcglobal.net This page accessed Thanks, Fidget! |