What's up with this
banner thing?
If
you don't see a navigation bar on the left, CLICK HERE
|
|
|
November
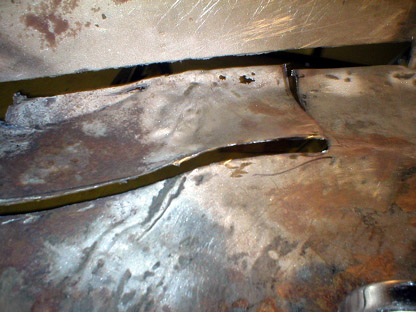
8, 2004 Trunk Work Part 5Last week I tried the repairs you see below and met with no success. I made two patches for the area I worked on tonight, and neither fit to my satisfaction. The problem is that the trunk area on the driver's side of the car was badly mangled in an accident and crudely hammered back into shape. The patch I was attempting to make curved downwards towards the rear of the car and had a lip on the outer edge. To make both curves in one sheet of metal was beyond my metal-shaping abilities. So tonight I made the same patch from three pieces of steel and it was far more successful.
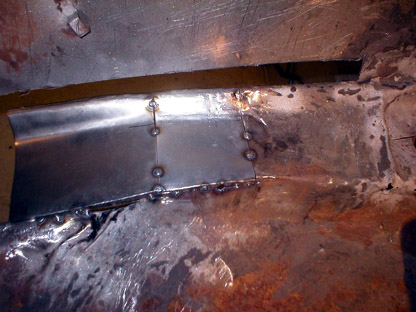
You can sort-of see in the photos above how the floor is contoured as it moves towards the back of the car. I decided that three or four separate pieces would follow that contour better than one large one. If you're not seeing how it all fits, the photos below will show you. First I made a paper template for the upper piece and cut it out of a sheet of 20-gauge steel. I formed a corner in my vise and gently hammered a curve to start to form the lip at the outer edge of the trunk, just like on the other side.
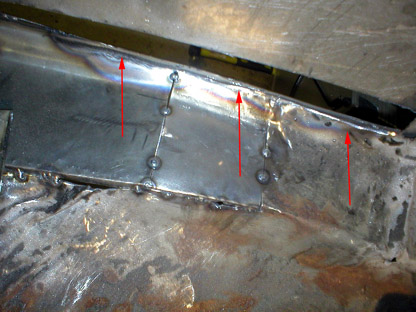
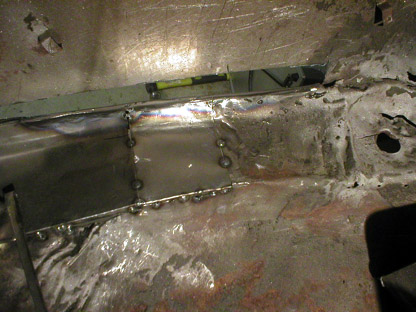
With those two patches in place, I had to recreate the folded edge at the outside of the trunk floor. I struggled initially trying to make the metal fold almost 180 degrees and simultaneously form a nice curve, but it would not do both that and remain straight along the lower edge of the inner fender. When one was straight, the other was warped, and vice-versa. So I had to try something else. Again, using a separate piece of metal I made a much better patch. What I ended up doing was simply welding a flat piece of steel to the edge of the panels I'd just formed, joining it perpendicular to the slight fold-over I made (you can see the edge I'm talking about in the photo above--it is the outer edge of the trunk. By welding it perpendicular to the trunk floor, I didn't have to worry about making a perfect patch. Once it was welded in place, I simply took my cut-off wheel and cut it flush with the trunk floor. The weld bead was thick enough that I could grind a nice radius into it, giving it an authentic look. To help add some material to the area to make the radius stronger, I welded from the bottom and made a thick bead. Look at the photo below if you're confused:
I left the end of this patch unfinished because I'm not yet sure how the rest of the floor will come together. The next step will be installing the lower edge of the inner fender as I did on the driver's side in Part 4, then trimming the work I did tonight to match it and form a straight edge. That will be relatively easy. Previous Restoration Day E-mail me at toolman8@sbcglobal.net This page accessed Thanks, Fidget! |