What's up with this
banner thing?
If
you don't see a navigation bar on the left, CLICK HERE
|
|
|
October
31, 2004 Trunk Work Part 4Today's update doesn't really concern actual trunk repairs, but rather repairs that are necessary to continue the trunk repairs. Plus, they're all in the same area, so I lumped them together here. After working with Nick on getting everything to fit correctly, I found that by pushing the rear sheetmetal around with my Porta-Power, I could change the way it fits and get a very good gap all the way around the trunk lid. Unfortunately, it needs to be pushed in so many different directions that I would have to brace it in all directions before I weld it all back together--it would look like I was building a tube-chassis under the car. So I decided that I would replace as many of the factory supports as possible, including the cross brace and trunk floor. But before I could even do that, I had to repair the inner fenders, which is what I did today.
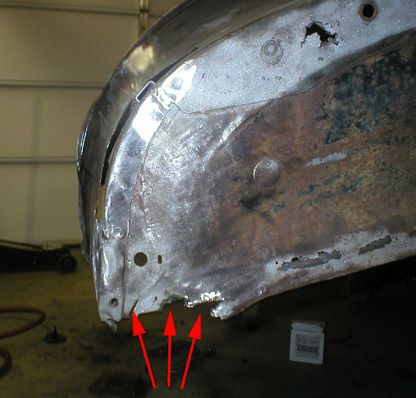
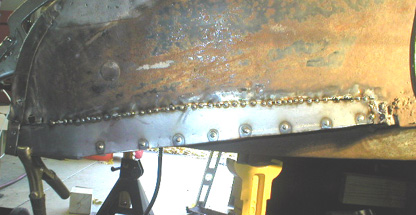
You may recall that the inner fenders were in pretty rough shape with perforation along the top and bottom edges. I'm not going to concern myself with the upper edges right now, but the lower edges needed to be rebuilt before I could reinstall the rear cross brace. The trunk floor folds over at the outer edges of the trunk and is spot-welded to the inner fender. The groove between the two tends to collect water and other debris, so it rusts pretty badly there. So I drilled out the spot welds, separated the panels, then cut out the lower edge of the inner fender.
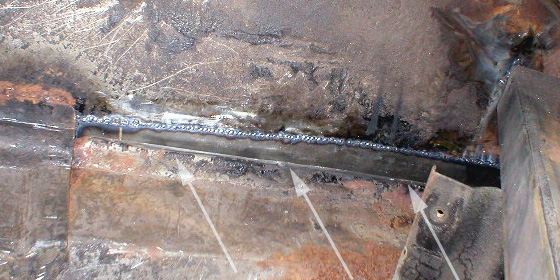
Next, I cut away the damaged area of the trunk floor. The area has an interesting concave shape to it that would be virtually impossible for me to duplicate, but since this is an area that nobody will ever see again, I cut a corner (ha!) and simply bent my patch to the same angle and welded it in. I used a series of spot welds until the entire seam was closed up. Then I dressed it with my grinder so that it looked good from inside the trunk.
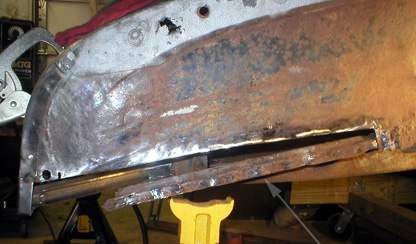
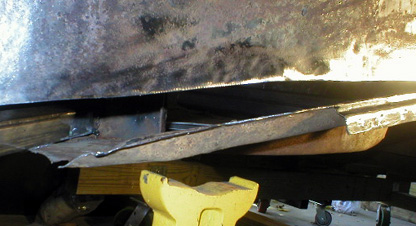
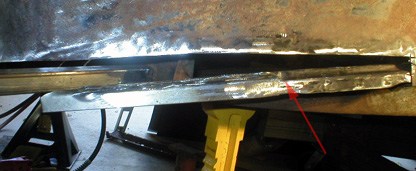
Once I had the trunk floor repaired, I used cardboard to make a template for a patch for the inner fender. I also added enough additional metal to form a 3/4" lip on the bottom edge near the back of the car--this was entirely rusted away (see top photo). That lip would serve as the locating point for the rear cross brace. Then I spot-welded it in place, spot-welded it to the floor as original (I drilled a 3/16" hole and welded the two together--it looks pretty authentic). I finish welded the joint by using a series of spot-welds and jumped from one end to the other to reduce heat build-up in the part. I have found that using a low heat setting and very slow wire feed combined with a short lead on the weld tip makes very nice welds. Check it out:
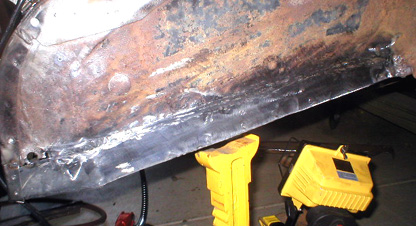
Then I dressed the repair using my cut-off wheel to knock the weld bead down nearly flush with the sheetmetal, then finished it with my die-grinder and some 80-grit sanding wheels. Using this technique, you don't run the risk of thinning the metal too much and blowing holes in (formerly) healthy steel. Then I used a hammer and dolly to knock the welded area flat and flush with the surrounding metal and take some of the age-induced dings and waves out of the fender. A little lead filler and it will be as good as new and even a close inspection will not reveal the patch. This is my best metal patch so far...
Previous Restoration Day
E-mail me at toolman8@sbcglobal.net This page accessed Thanks, Fidget! |