What's up with this
banner thing?
If
you don't see a navigation bar on the left, CLICK HERE
|
|
|
December
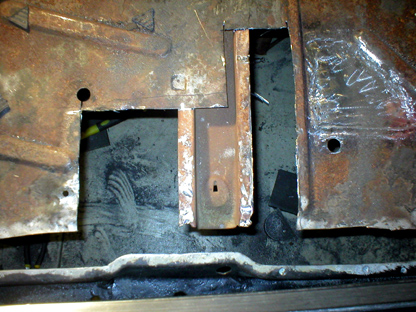
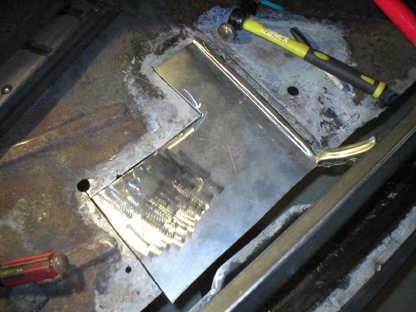
1, 2004 Trunk Work Part 11I took today off from work (yeah, I know it's a new job, but it's stressful, so I took a day to get some therapy in the garage), and spent most of the day working on the trunk floor. I had hoped to finish everything, but sometimes these things take more time than you'd think. The first thing I tackled was the larger patch on the floor. It sits right on top of a fuel tank brace, so I had to be careful not to cut the brace as I was removing rusty sheet metal. Even though the floor is mostly flat, this patch would also cover part of a stiffening bead that runs down the center of the trunk. I had to fabricate my patch with a raised portion to match the bead. While it may appear difficult, I was able to simply bend it into shape using techniques I've already shown you. It turned out pretty well.
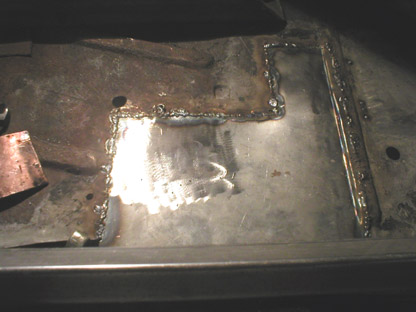
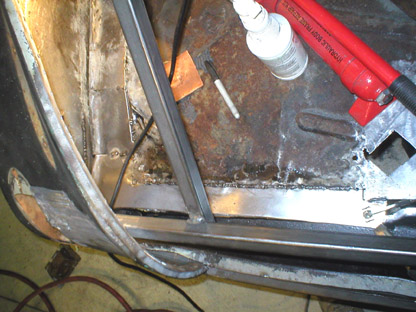
Once the floor was patched, I moved to finishing the repairs on the very rear edge of the trunk, including securing the brace. We had dinner with Nick Seybold last night, and he suggested that I measure the distance between mounting holes on the frame to determine the correct location of the brace. I have it pulled pretty far back to help push the rear sheet metal into shape, but my measurements confirmed that it was in the right place. So I tacked it to the inner fender panels that I fabricated a few weeks ago. Once the brace was secured, I started making patches for the floor. These patches would be extensions of the floor panels. Then there is a panel on top of that which covers the brace itself. Then there is a third piece which forms the upper edge of the lip at the trunk opening. The first patches here will be the extensions of the trunk floor to the edge of the brace, so they have to be seamlessly welded to the existing trunk floor and spot welded to the brace. I decided to do it in three sections, left, right and center. Unfortunately, I only had time to do the left one today. The left patch was "L" shaped to meet the patches I made earlier at the inner fender. That also mean that there was a slight contour to be accommodated. The rest of the patch was flat and easy to fit. I cut it out, did some fine tuning, and welded it to the floor after using my floor jack to raise the floor to the same level as the brace (without being connected to the brace, the floor tended to sag).
I'll do the remaining two patches next time, then work on the panel that encloses the brace area. Previous Restoration Day E-mail me at toolman8@sbcglobal.net This page accessed Thanks, Fidget! |