What's up with this
banner thing?
If
you don't see a navigation bar on the left, CLICK HERE
|
|
|
December
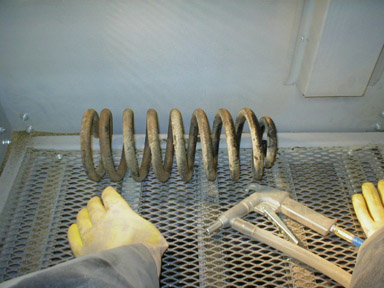
29, 2002 Blast cabinet in action!You'll notice that I made a new background. I was getting sick of the old ones, and thought you might enjoy some variety. Hope it isn't too hard to read. Anyway, I didn't have a lot of free time today as I had planned, so no scraping got done. I did, however, order some GreaseMaster and some rust remover from Rusteco. It's expensive, so I ordered the smallest amounts possible just to experiment with it. If it works as well as they claim (and as well as Tom Brownell claims in his book, How to Restore Your Collector Car), then I'll be a customer for life. The first thing I did today was change the media in my blast cabinet to something called "fast cut." I believe it is a carbide-type abrasive, and it is black in color (I actually saw sparks as I blasted the metal springs). We had walnut shells in there before to strip some brass fixtures from my house (original 1920 items!). This was going to be my first real test of the compressor, lines and cabinet on Buick parts. Before I started blasting, though, I had noticed while blasting the brass fixtures that my shop vac was just too powerful for the cabinet. Without it, the cabinet would fill with dust and it would leak out the ventilation port and onto my wall. It also filled the air, making everything very dusty. But with the vacuum on, it seemed to suck out all the abrasive as well as the dust. So I built a small electrical box with an outlet and a rheostat, and a long cable that would plug into a grounded outlet. I now have an adjustable output power outlet for my shop vac. I can turn the vac's speed down until it just starts to pull the dust out, but lets the abrasive fall back into the hopper. Eventually, I think I'll invest in a proper cabinet vacuum, but for now, this seems to be working very well. If you've used a blaster before, this page probably won't be very interesting to you. I haven't used a blast cabinet since I was a kid working for someone else, and it's been #1 on my list of tools to get for a long time. This is my first real opportunity to use it as intended. So I grabbed the front springs, which weren't really greasy, just dirty and rusty. I threw one in the cabinet, set the air pressure to 115 or 120 PSI, and started blasting.
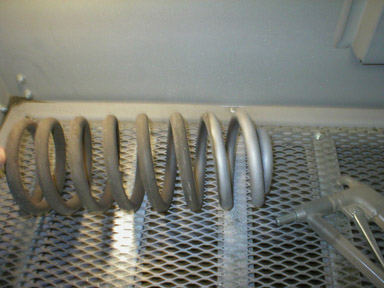
The fast cut certainly did bite through the crud very quickly. It was kind of tricky getting all the sides of the spring and moving it around in the cabinet, but overall, the cleaning went very quickly.
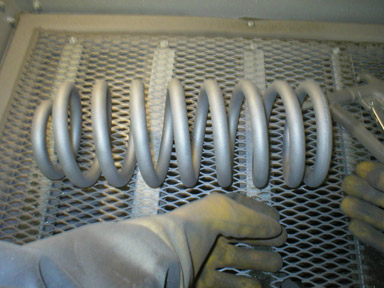
When I was done, I used a pair of gloves to remove the spring from the cabinet and prepared it for powdercoating. But that'll have to come later this week--I still need to find an oven to cure the powder in. A used one shouldn't be too hard to find.
It's very important not to touch the freshly cleaned metal with your hands--the oils from your skin will rust the metal very rapidly and contaminate the surface so that the paint or powder will not adhere to it properly. I remember when I was a kid blasting stuff as an apprentice to a master restorer, I removed a freshly blasted oil pan from the cabinet with my bare hands. The next morning, it was covered with little 14-year-old finger prints. Cleaning the metal with a solvent or metal prep such as Picklex-20 will prevent this from happening and will remove any micro-rust that may still remain. It also puts on a phosphate coating that is perfect for primer or powder adhesion.
E-mail me at toolman8@sbcglobal.net This page accessed Thanks, Fidget! |