What's up with this
banner thing?
If
you don't see a navigation bar on the left, CLICK HERE
|
|
|
Amateur
Auto Restoration
IÆm
guessing that most members of the BCA probably own, or know somebody who owns, a
restored vintage car. If you restored it yourself, then youÆve already been
through what may be among the most challenging yet rewarding tasks known to man.
If not, you probably suspect that restoration is a task of monumental
proportions, and maybe you even think thereÆs no way you could do it yourself.
ThereÆs no way around it: it is a big job, but certainly not an
insurmountable one, even for the amateur mechanic. Allow
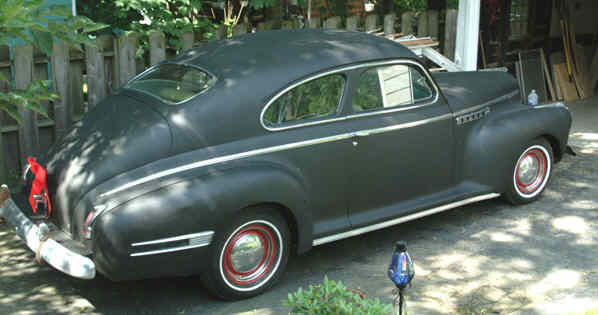
me to introduce myself: my name is Matt Harwood (BCA #38767). IÆm 34 years
old, live in Cleveland, Ohio with my wife, Julia, and IÆm performing a
frame-off restoration on my 1941 Century 66S sedanette. I wanted to contribute
something to my club and my hobby that would help others realize that restoring
an old car is definitely not an impossible task best left to professionals. In
this article, and those that follow in the coming months, IÆll let you tag
along with my project, share my lessons, learn from my mistakes, and see that a
regular guy with average tools and a modest budget (an understanding spouse is
also mandatory!) really can perform a top-notch restoration. The
skills IÆve learned on this project are applicable to any
restorationŚvirtually nothing IÆll show you is unique to 1941 Buicks.
Instead, IÆll take you through the steps and techniques that IÆm using to
achieve my goal of having a BCA Senior sedanette. Bear in mind that IÆm not an
expert in most of the fields required for restoration, but I am familiar with
all of them as IÆm sure many of you are. So as you read, remember that my way
isnÆt the only way to do somethingŚitÆs just the way IÆm doing it
and that it may change at any moment. Finding
the car was difficult; I spent nearly two years searching for my Century. I
turned down some rough specimens and held out for what I really wanted, even
when some mighty tempting offers came my way. The car I ultimately purchased is
a lifetime Colorado car that was in daily service until about 1976. Overall, it
is 97% complete, rust free and functional, but just plain worn out. So this was
lesson number one: buy the nicest example of your dream car that you can
findŚitÆll save you a small fortune in the long run, as youÆll see.
My workspace is my home. I have a 2Į-car
garage which houses JuliaÆs car and about half of the Buick (with the rest of
it living in the attic, the basement, the spare bedroom, and anywhere else parts
can hide). I also have a small workshop in the basement that houses my blast
cabinet, painting area and a small workbench. Over the past fifteen years or so,
I have amassed a good selection of hand and air tools with an air compressor to
power them. I have a small MIG welder that IÆm just now getting the hang of.
And thatÆs about it. This brings me to lesson number two: buy the right tools
when (and only when) you need them, and get the best your budget will allow. Initially,
my goal was to simply give the car a facelift and enjoy it as-is. But once I
started going through a safety check of its systems, I decided that a frame-off
restoration was the only way I was going to be satisfied with the end result.
Though my car was fairly solid, I am the kind of guy who over-engineers
everything I do, so I knew I would need to ensure that each component was just
as good as I could make it (my father likes to joke that IÆm restoring the car
ōdown to the molecular levelö). Of course, this changes the magnitude of
the project, but I feel confident that I can achieve my goals no matter how
ambitious. HereÆs
my third lesson: before taking your car apart, set goals for the project, make a
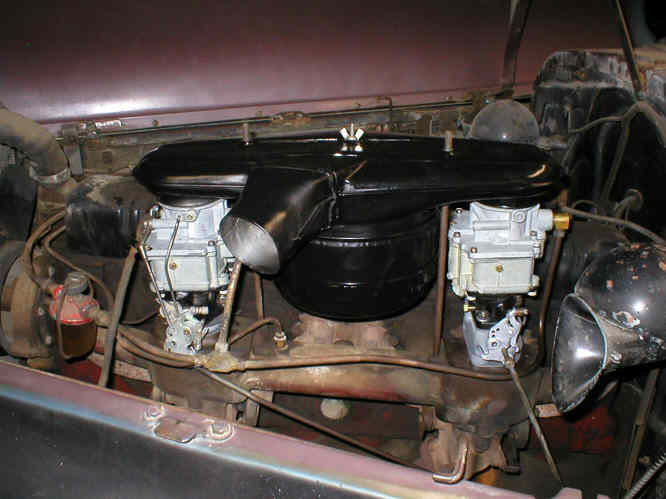
plan, and stick to it. If IÆd set my goals earlier, I would have saved a lot
of time and money spent on restoring the carburetors, brakes, cooling system,
electrical system and exhaust, all things that will have to be redone during a
frame-off restoration. If youÆre undertaking a restoration for any reason
other than pure enjoyment, you should probably leave it to somebody else. You
should take pleasure in the restoration work as much as the result, otherwise
both will likely disappoint and frustrate you.
I
have broken my project into five distinct phases: disassembly, chassis
restoration, body restoration, engine restoration and interior restoration, in
that order. Why? Because I believe that the car should be restored from largest
to smallest components and from most durable to least durable. For instance, you
wouldnÆt put a new interior in a car that hasnÆt been painted yet, would
you? Of course not. This is the same reason I have put off the restoration of
the engine until the bodywork is doneŚwhy have a fresh engine sitting around
when youÆre generating A LOT of dust, working around the firewall and
floor, and reassembling the body? Engines donÆt age well if they arenÆt used
and I donÆt want to leave this 862-pound monster lying around for several
years after IÆve just invested heavily in its restoration. With
an amateurÆs time and resources being what they are, some phases of the
restoration will inevitably overlap. While I worked to disassemble the car, I
also started doing some floor pan patches. As the chassis comes together, IÆm
simultaneously stripping the body and replacing damaged sheet metal. Usually
this is to keep the project moving in a positive direction and to let me
continue the ōtherapy sessionsö that involve getting my hands dirty out in
the garage. I believe that overlapping stages is fine as long as each task
doesnÆt interfere with the one immediately before or after it, just so you
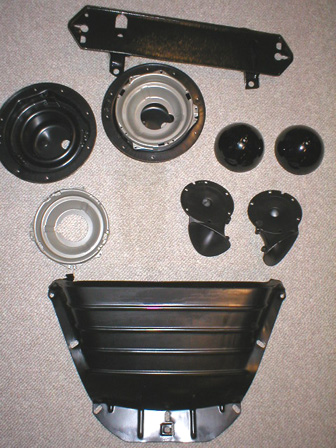
donÆt have to do anything twice. During
the disassembly stage, I have tried to restore the parts as IÆve removed them,
hopefully avoiding the sinking feeling IÆm sure others have faced when
confronted by a pile of rusty parts that were once a complete automobile. That
way, I can pull finished pieces off the shelf to show people (you will come to
call them ōdoubtersö) my progress, and IÆm never left with what is
commonly known as a ōbasket caseö if I need to sell the project. Having
smaller tasks also helps keep you motivated and excited about the project, and
keeps it moving forward.
The
most important part of any amateur restoration should take place before you turn
a single wrench: research and information. Everybody will tell you that itÆs
important to be intimately familiar with your particular make and model of car,
and thatÆs excellent advice. But IÆve quickly learned that you canÆt
possibly know what youÆve gotten yourself into until you have an honest
appraisal of what you are capable of accomplishing on your own. Arm yourself
properly by learning about the processes that go into restoration: welding,
panel-straightening, priming and painting, engine rebuildingŚthe list goes on
and on. If you donÆt know how something is done, it tends to look much larger
as you approach it. For instance, many folks think fabricating and welding patch
panels is a black art practiced only by elderly men with foreign accents and
arcane toolsŚI know I did, and I was most concerned with patching my carÆs
floors. But the truth is that patching metal has turned out to be one of the
simpler and more rewarding tasks IÆve accomplished. Painting
is similarly frightening to many because itÆs so visible on the finished
product. But the reality is that the difference between a lousy paint job and a
spectacular one is usually nothing more than time and good old elbow grease.
Engines are engines, and very few provide unique situations that canÆt be
solved by a smart restorer and his machinist. Study the processes involved
before you get started, and youÆll see that some of those scary restoration
tasks become much more bite-sized. You may even start looking forward to them! In
my next article, IÆll take you through the disassembly process and talk about
some of the techniques IÆm using to restore each component. E-mail me at toolman8@sbcglobal.net This page accessed Thanks, Fidget! |