What's up with this
banner thing?
If
you don't see a navigation bar on the left, CLICK HERE
|
|
|
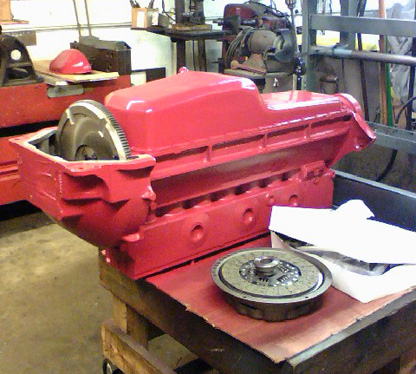
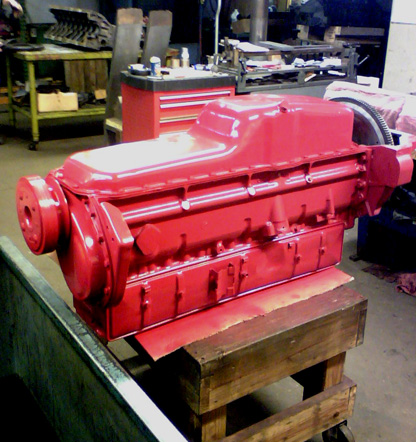
January 2, 2008 Progress Resumes/Engine AssemblyYes, I'm back at it. Things in my life have changed once again: I've gone back to work in the corporate world, giving up on trying to make a living flipping houses. As you undoubtedly know, the market is just too depressed right now. A regular paycheck will enable the project to get underway once again. It'll also help my state of mind and free up a lot of my time after work to do other things. Hopefully I'll be able to get back to writing a monthly column here and my "Auto Restoration for Amateurs" series in the Buick Bugle, both of which I really miss. Along those lines, my engine is in the final stages of assembly, and some things have changed and some things are progressing as planned. First, the engine will be painted, not powdercoated. This is due to the fact that we could not torque powdercoated bolts, especially the head bolts (which are exposed), and there was no way to powdercoat the assembled engine due to gasket (cork) limitations. So Al and I decided to paint the engine once it is assembled, just like they did in 1941. This is how Al does Doug Seybold's engines, so if it's good enough for Doug, it's certainly good enough for me.
Second, I decided to forego Extrude-Honing the manifolds. Given the basic design limitations in the stock manifolds and the fact that this engine will never be driven in fury, I figured that was $700 that could be better spent elsewhere. However, the manifolds will most likely be coated with some kind of permanent coating other than paint. Mark Brown at Creative Powder Coatings has a high-temperature cast iron gray powder for the exhaust manifolds. But since my manifolds have cracks, I'm going to hold off and see if I can get them welded somewhere before I spend a pile of money getting them coated. If I can get them fixed, I'll have them Jet-Hot coated, along with the intake manifold to try to control heat soak and vapor-lock. If they can't be welded, I might just paint them and wait until they crack before dealing with them. However, we did incorporate most of the improvements I wanted. From Doug Seybold, I acquired a set of later model insert bearing-equipped rods and a timing chain cover that features a neoprene seal instead of the original rope seal. Doug also supplied the .010" over main bearings and one of his custom-ground 3/4-race camshafts. There's a rebuilt oil pump with a high-pressure spring in there, too.
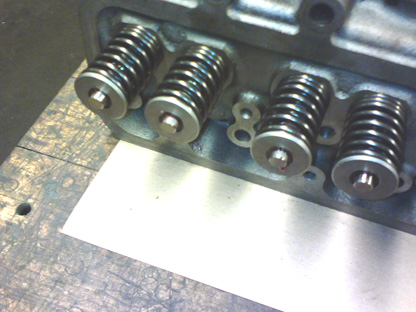
The head features a high-flow 3-angle valve job, hardened valve seats for unleaded fuel, new stainless steel valves, upgraded valve springs and a rebuilt rocker arm assembly. Al also decked the block and shaved the head to raise compression to about 7.8 or 8:1.
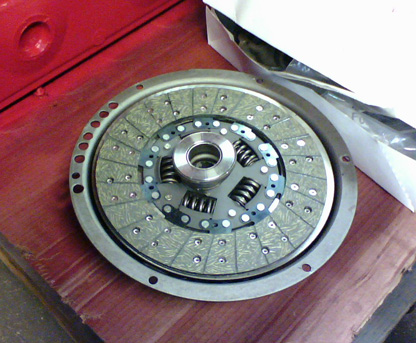
Al rebuilt the stock clutch and resurfaced the original flywheel. The clutch has modern friction material that should last longer than the original asbestos-based lining. A new throwout bearing is included.
Today I delivered the last few parts Al needed to finish the rebuild, including the clutch fork. He expects to have it completely finished by next week. I still need a water pump, and have two on order from two different suppliers, one of whom doesn't have any in stock. We'll see which one gets here first, and I'll return the other. Al can't paint the engine until the water pump shows up, so I'm hoping it'll be soon. The down side is that my decent workshop at my old house isn't available to me any more. My current garage, while considerably larger, is drafty and unheated. Electrical power is limited to an extension cord from the house on a single 20-amp circuit. That will change sooner or later, particularly if I add on to the garage as I am planning. But for the moment, I'm held up by the weather. I have just about all the parts of the chassis refinished and all the rubber bits and pieces from Steele Rubber. The transmission is rebuilt, the torque tube painted and the rear end powdercoated. The rear gears are currently 3.90s, but I'm contemplating a set of 3.42s out of a '54 Dynaflow car that I've located. I'm not sure what's involved in swapping the pumpkin on the torque tube, but Nick Seybold tells me that it's a headache and a half. We'll see. My point is that I'm in a position now to have a fully assembled chassis when the weather breaks in the spring. Once that's done, I can start finishing up the body work and concentrate on getting the body mounted on the frame. It'll be that much closer to being a real car at that point, and will give the project a much-needed injection of momentum. I'll also get another garage space back so all our other cars don't have to live outside, or perhaps the Mustang will have a home if our investment house—where I'm storing it—ever sells (coming up on 2 years of nothing. Feh.). Thanks to everyone who has been asking about my progress. I hated leaving you hanging. Updates will be more frequent now that my life is more regular, though until spring, they'll probably be sporadic at best. But I am still working, still spending a ton of money, and I'll keep writing about it right here. Previous Restoration Day E-mail me at toolman8@sbcglobal.net This page accessed Thanks, Fidget! |