What's up with this
banner thing?
If
you don't see a navigation bar on the left, CLICK HERE
|
|
|
February
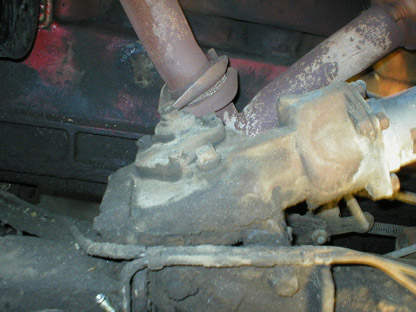
28, 2003 Steering DisassemblyWell, I woke up this morning feeling lousy so I called in sick to work. After sleeping all morning, I felt better and decided to go out into the garage and take advantage of the warm(ish) weather here in Cleveland (the shop was about 37 degrees, which is tolerable). Since I had the entirety of the front suspension removed and Doug was finished with my kingpins, I decided to remove the steering in preparation for disassembling the dashboard. Until today, my pitman arm and tie rods were just dangling and scraping around on the floor whenever I moved the steering wheel. I started there, and put my puller jaws on the pitman arm to remove it. After several failed attempts, I used the pickle fork and it popped right off without any damage to the arm or the teeth on the steering shaft. The tie rods and pitman arm were coated with dirt, mud and grease. Since I didn't really fancy spending a few hours scraping dirt off, and we've seen how effective the soaking solutions I tried have been, I just put the parts on the wire wheel and made short work of the mud and gunk. A quick blast in the cabinet and they'll be ready for powdercoating. Next up, I decided to remove the steering column so I could start removing the dashboard. I unbolted everything I could find connected to it, removed the shifter and turn signal stalk, then unbolted the steering column from the dash support. Finally, I unbolted the steering column outer sleeve from the steering box.
Unfortunately, the steering column doesn't just slide out of the steering box. The shop manual is typically vague on this subject, so I just pulled the entire assembly off the frame, and I'll have it rebuilt as a unit. I'm guessing that some of the shift mechanism as well as some internal springs or something are holding it together.
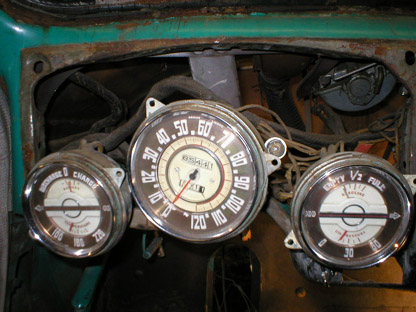
With the steering column out of the way, I decided to continue on the interior by removing the instrument panel. There were four studs with nuts holding the instrument panel to the dash panel, which I only accessed by feel. A little fumbling around and it was free so I could unbolt the gauges. The wiring crumbled as I worked, dropping in my eyes and generally making a mess. But the instrument panel came out without a hitch.
I finished the day by disconnecting the gauges and removing them from the car. The coolant temperature gauge uses a capillary tube that is not removable from the gauge, so it's important to be careful not to damage it during removal. I unscrewed it from the engine block and fed the line through the hole in the firewall so I could remove the gauge cluster. Still, based on the condition of everything involved with the coolant gauge, I'm guessing I'll replace it anyway--the tubing has a kink in one or two places. We'll see what the gauge restorer says. Previous Restoration
Day E-mail me at toolman8@sbcglobal.net This page accessed Thanks, Fidget! |