What's up with this
banner thing?
If
you don't see a navigation bar on the left, CLICK HERE
|
|
|
March
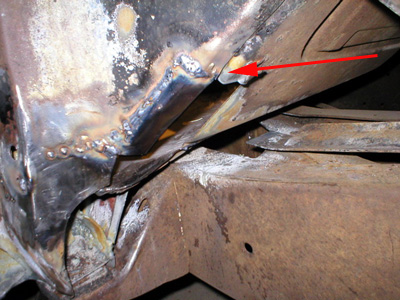
6, 2004 Floor Repair Part 6This is probably the last of the floor repair log entries I'll make until everything is done on both sides--you're probably sick of seeing the same stuff over and over, though I'm pretty proud of my results so far. Today I patched the last opening in the floor on the passenger's side. There is one small area that still needs a patch inside the door pilliar, but that will be easy. The first patch I made today was the corner of the lower cowl where I cut out the last little bit of rust and made a patch that followed the body's contours. It took a little grinding and finessing, as expected, to get it to fit right, but that's part of the job. On this patch, it was critical to get the corner right and to match the existing lap joint as exactly as I could. This is probably the most visible patch I'll make on the car, so it was important to make it right.
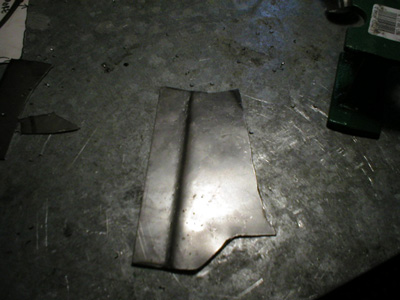
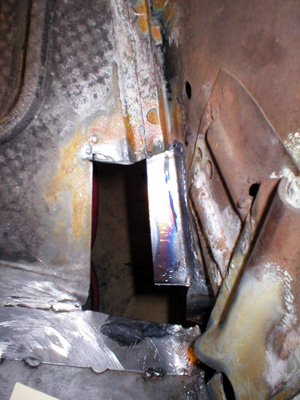
The next patch was to close up the entire floor area. It would be a continuation of the toeboards joining the flat floor boards. It would form part of a lap joint with the first patch and completely seal the floor area from the elements under the car. I noticed that the original toeboards are flanged to overlap the cowl panel I'd just patched. The patch would have to be flanged to match those contours if I was going to make the repair look correct. Some folks wouldn't bother with the flange and just weld it all shut, and it would probably never be a problem. That wouldn't sit right with me, so I flanged the patch to match the original contours. This would turn out to be the most difficult patch yet.
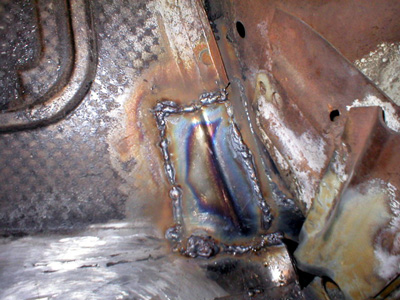
I also wanted to duplicate the small ridge that runs along the bottom edge of the toeboard, since I don't know what will and what won't show once the carpet is installed. I'm guessing that it won't be visible, but why not? Who cares? I care. After finessing the patch for about an hour, test fitting, grinding a little more, testing, grinding, bending, etc. Finally, it was close enough to weld. I tacked it in place, made some final adjustments to the shape, then finish welded the entire patch.
Also, for those of you who E-mailed me concerned that I was welding over rust, rest assured that I'm not. The areas that look like light surface rust in the photo above (lower right corner) are actually treated with Picklex-20. The rusty color is just runoff from some Picklex that got on the still-rusted areas above. So there's no problem. In fact, Picklex is supposed to improve weld strength by up to 60%. You can weld right through the phosphate residue and paint over it without problems. Great stuff. I get it from Len at Autobodystore.com. Previous
Restoration Day E-mail me at toolman8@sbcglobal.net This page accessed Thanks, Fidget! |