What's up with this
banner thing?
If
you don't see a navigation bar on the left, CLICK HERE
|
|
|
March
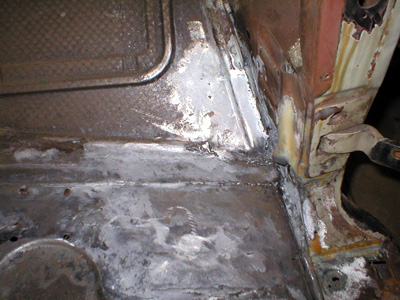
21, 2004 Floor Repair UpdateOK, I know I promised that there wouldn't be any more floor updates until I was done, but I kind of miss doing regular updates, so here's an update of what I've been up to for the past two weeks. The passenger's side is pretty much done except for some final grinding and finishing and the fabrication of the interior support bracket. I also started on the driver's side this afternoon. The last few things I did on the passenger's side was grind the welds flush and weld in the final patch inside the hinge pillar. I also did some finish welding on all the patches, but kept blowing through the original floorpans because they were pockmarked and thin from rust (that was removed using Picklex). So I cut that part out instead of chasing the holes with the welder, which just made big blobs of weld that weren't going to be easy to hide, even with some grinding.
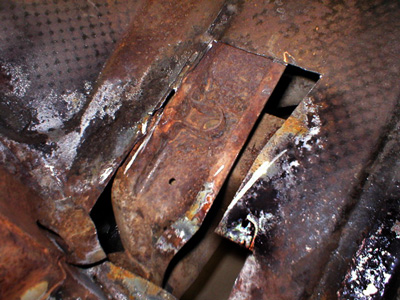
On the driver's side, I started by cutting out the interior support bracket and removing the rusted panel underneath. It was like lace. Fortunately, the lower body brace was in fine condition save for some surface rust. I noticed a few differences between it and the bracket I fabricated, particularly where the bod bolt passes through it, where there is a gusset to provide some additional stability when the bolt is tightened. I'm going to see if I can shore mine up somehow, possibly with a spacer that I'll install when I bolt the body back on (whenever that is...).
I cut the interior support brace apart so I could work on the floor. I believe I can salvage it and use it as a template for the passenger's side. I'll throw it in the blast cabinet to clean it up. Once the floorpans are repaired, I'll weld it back in place and everything should be as good as new.
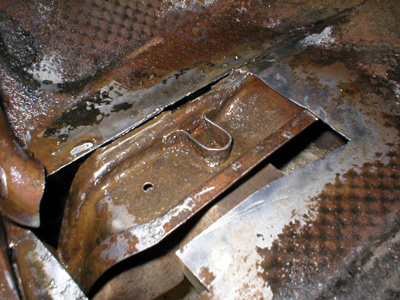
I hit the inside of the lower brace with some a variety of wire wheels on my die grinder to clean up as much rust as I could, especially in areas that I won't be able to reach in the future with a sandblaster or chemicals. Once the body is off the chassis, it should be easier to reach all the bottom areas that are not quite perfect, but the very end of the lower brace will be impossible to get at, so it has to be as clean as it can get now. A good step is Picklex-20, which will convert even micro-rust to a rust-resistant coating. So I hosed the area down with a little bit. When it dries, I'll apply some Zero-Rust inside and around the lower brace to seal it up and protect it. When it's time to prep the bottom of the car, I'll try to spray the primer and final coats up inside there and hope it works out.
Previous
Restoration Day E-mail me at toolman8@sbcglobal.net This page accessed Thanks, Fidget! |