What's up with this
banner thing?
If
you don't see a navigation bar on the left, CLICK HERE
|
|
|
March
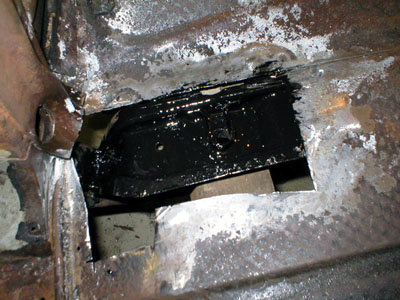
23, 2004 Driver's Side Floor RepairThe driver's side of the floor was in much better shape than the passenger's side for some reason. I suspect that at one time the windshield leaked from above on the passenger's side, trapping moisture in the carpets, which were long-gone. This particular area also seems to collect a lot of road debris and sludge, leading to the brace underneath rotting out. On the driver's side, however, the brace was still intact and usable. The first thing I did today was make my template for the floor patch for the hole I cut out two days ago. The shape was easy, but the contours of the floor in this particular area are quite complex, leading to a lot of test fitting, hammering and adjusting until I had the patch just right. Satisfied that it would fit, I painted the inside of the lower brace with Zero-Rust to give the area some protection in the future. With this area as difficult to access as it is, I didn't know if I would be able to get any epoxy primer or body schutz into the crevice when it came time to paint. A little prevention never hurts.
Then I placed my patch and tacked it in several places so I could fine-tune the fit. You can't see it in the photos, but the floor takes a significant dip downwards as it moves towards the door sills, but is simultaneously curving up as it nears the toe board that overlaps the patch area. Complex curves like that are difficult to make on a bench, so I try to fine tune them with a hammer and dolly once the patch is in the car. I strive to get my gaps between panels about 1/16" or less to make a cleaner weld, but up to 1/8" is OK, too.
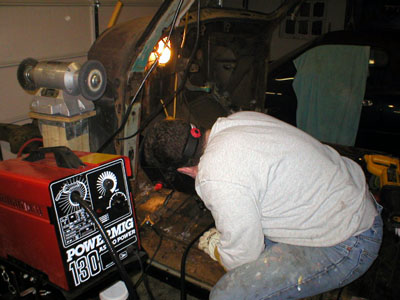
I slowly finish welded the edges of the patch. I've found that I have the best luck welding sheet metal using the "push" technique with the welder and a slower wire feed speed. The push technique is when you angle the tip of the welder into the weld, pushing the weld puddle in front of the tip. It's basically the same setup as a left-handed person uses when writing, pushing the pen across the paper instead of "dragging" it, which is the opposite of push welding and the way right-handed people tend to write. At any rate, my weld quality continues to improve, though I still get occasional places where I blow right through the metal. This is frustrating, because it is tempting to "chase the hole" with the welder, which usually only enlarges the hole. The best thing to do is move somewhere else and let the area cool, then come back and close the hole up with a series of short tack welds that have time to cool. If you try to do it all in one shot, the hot weld metal just drips through the hole because it doesn't have anything solid to grab as it cools. You usually just end up with metal stalagmites hanging down from your floor that have to be ground down from below to clean them up. Again, practice is key, and I'm pleased to see tangible improvements in my welding.
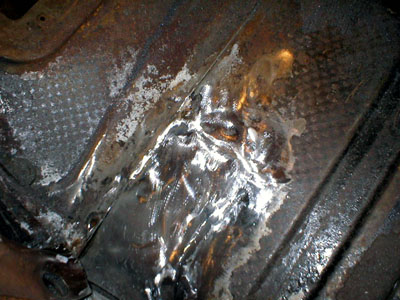
I'm also glad that I can pretty much make the welds disappear, no matter how crappy, by grinding on them for a while. There are still some rough areas, but instead of trying to chase them with more welding, I'm going to use lead to fill them on the bottom of the car. It may be overkill, but I don't want anyone looking under the car and seeing floor patches. As far as I'm concerned, once this car is done, it will be just like the day it left the factory, or as close to it as I can come. I'm using lead instead of plastic body filler just in case the floors flex slightly as people get in and out or when driving. I think the plastic will crack, while the lead will flex with the surrounding metal. Are my standards too high for this sort of repair? Maybe, but it's a good way to practice new skills in a place that will be virtually invisible. With enough time, any mistake I make can be fixed pretty easily. That certainly isn't the case with body panels. New background, too. Hard to read? I can't tell any more... Previous
Restoration Day E-mail me at toolman8@sbcglobal.net This page accessed Thanks, Fidget! |