What's up with this
banner thing?
If
you don't see a navigation bar on the left, CLICK HERE
|
|
|
September
7, 2003 Heater/Defroster RestorationToday I finished the parts I blasted the other day, including the heater and defroster housings and their fans. The powder I bought from Caswell was virtually the exact color I needed for these parts, and I'm really pleased with how they came out.
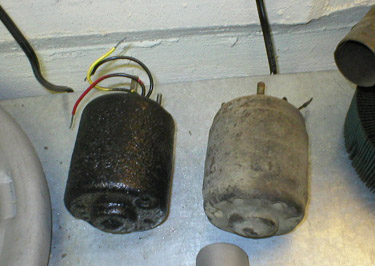
I also tested the motors for both the heater and defroster, as well as the NOS motor I purchased, using my rectifier. By setting it at 6 volts, I could spin a motor with as few as 2 amps. As luck would have it, both original motors are still operational, while the NOS motor is not. Still, the originals were a little noisy and weren't too happy turning, so I blasted them with some WD-40, which helped a bit. Since I don't know anything about electric motors, I'll have them rebuilt, including the NOS motor, so I'll have a spare if I ever need it.
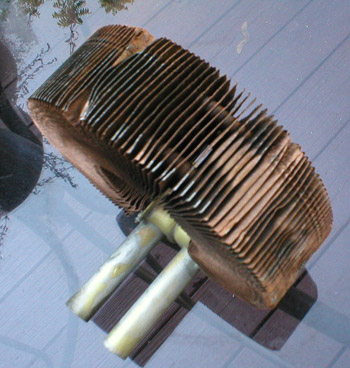
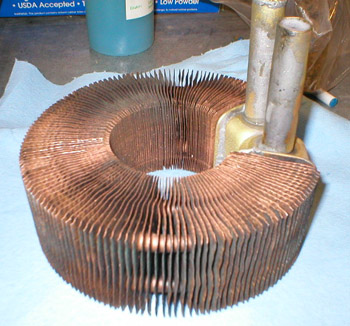
The last part of the restoration was testing and restoring the cores. I placed the underseat core in a bucket of soapy water to try to clean off some of the gunk trapped in the fins. I threw the defroster core in the blast cabinet and went over it lightly to just clean off some of the corrosion.
Then I spent about an hour
straightening all the fins and tried to make them look correct. I ordered some radiator
paint from Eastwood
Previous
Restoration Day E-mail me at toolman8@sbcglobal.net This page accessed Thanks, Fidget! |