What's up with this
banner thing?
If
you don't see a navigation bar on the left, CLICK HERE
|
|
|
October
19, 2004 Trunk Repairs Part 3This update covers two days of work, but the net result of that labor only adds up to about two hours when all was said and done. I'll explain why as we go along. I decided that I would repair the exterior of the body first because the trunk opening needs to be right before I start replacing inner panels. With that in mind, I started cutting away the rear corners of the car. My original thought was to replace a large chunk of the rear area around the taillights. I also wanted to try a technique for metal forming called a "flexible pattern." I learned about it at the absolutely amazing www.metalmeet.com website, which is a must-read for anyone interested in working with metal. So I tried to make the pattern and form a new panel using a hammer and shot bag.
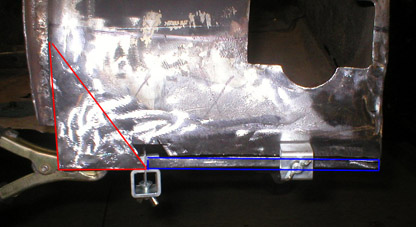
Unfortunately, the area was a compound curve--not only was it curving down towards the bumper to complete the fastback shape of the car, but it curves outwards where it meets the trunk lid. I wasn't going to get this done with one panel using the tools I have (like I said, an English wheel is in the works). So I decided to replace only the areas that were damaged, a much easier proposition. My first patch was a small triangle (red area) to fix the corner between the edge of the trunk opening and the bottom of the body. The second (blue area) was basically the edge that folds under the body and acts as the support for the rear trunk brace and floor:
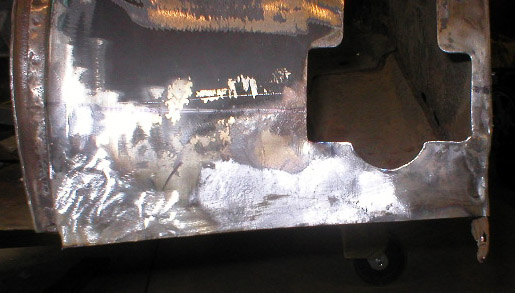
Unfortunately, the metal above the blue area was so thin because of rust and me grinding away the weld bead, I kept punching through. It was more than I could repair by welding, which only enlarged the holes. So I cut out the thin areas and welded in another patch above the blue one. And again, I was chasing thin spots. I decided that it all had to go, so that's where I started today: by cutting off the lower 2 inches of the rear corner of the car:
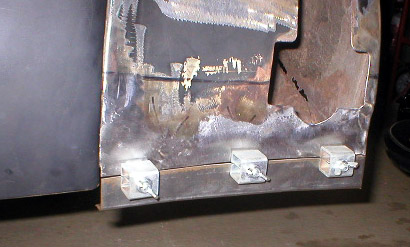
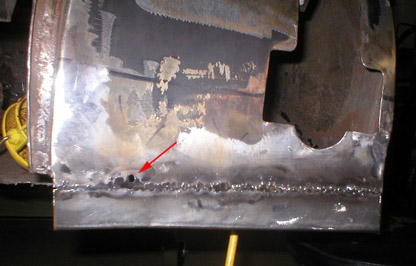
You'd think that would be good enough, but my welding skills proved to be my undoing. As I welded the patch in place using tack welds, one here, one there, I found that I was again blowing through the thin original metal, which apparently was stretched pretty thin during manufacturing. So I ended up chasing a bunch of holes with the welder, frustrating myself and work-hardening the metal to the point of worthlessness. I even made myself a copper spoon to try to back up the thin metal so I could weld it up. Crap. So I cut it all out again, about 1/4" above the old weld line, and had at it again. This time I stopped with only tack welds, intending to do the finish welding later, once everything is lined up properly.
Previous
Restoration Day
E-mail me at toolman8@sbcglobal.net This page accessed Thanks, Fidget! |