What's up with this
banner thing?
If
you don't see a navigation bar on the left, CLICK HERE
|
|
|
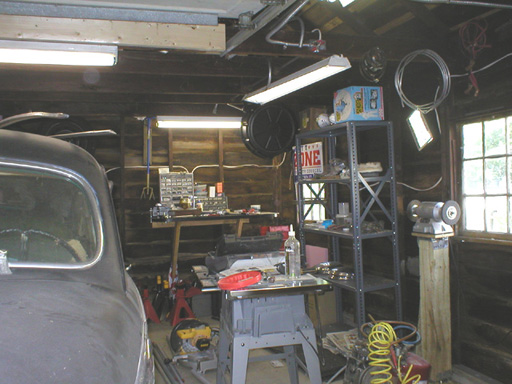
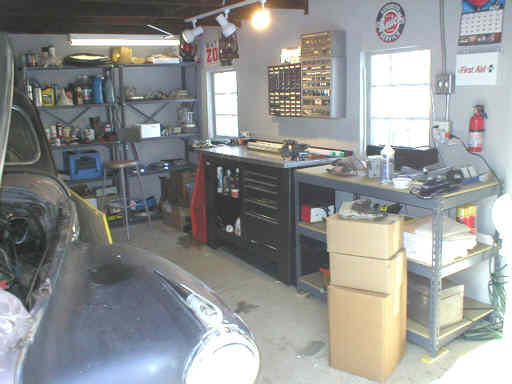
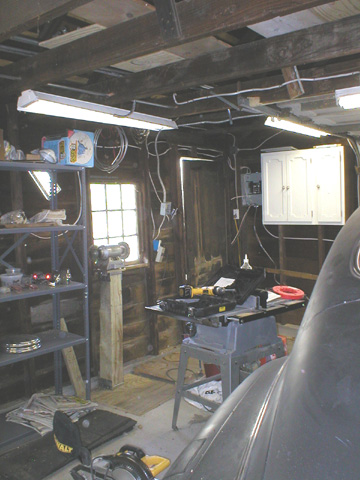
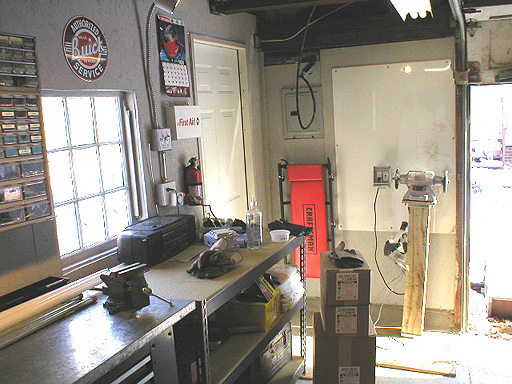
December 7, 2002 Where the HECK have I been?Before I go on to the restoration story, I want to take an important moment to thank the veterans of our country who served and died on this day 61 years ago. 1941 is a special year to me, and I don't want anyone to forget how important it is to America. OK, on to business. A lot of people have been E-mailing me asking if I've given up on the Buick. HECK NO! But in Cleveland, the winters are pretty harsh, and I needed a place to work over the winter if I wanted to keep the project moving. I also wanted to upgrade my garage to serve as a better work area for the project in the long term--something it desperately needed. I firmly believe that the quality of your work area largely determines the quality of your work. I have a 2.5 car detached garage that was as basic as they come: 2x4 construction with clapboard siding. That's it. The previous owners of my house poured a new concrete slab, for which I am grateful, but the garage itself was nothing remarkable. Add to that the fact that I had just moved into the house and hadn't gotten organized yet only made it more difficult to work on the car. So in late August, I decided a major renovation was in store. I had no idea it would take so long, cost so much, or be so rewarding. I've christened the garage the "Matt Zone" and Julia always knocks before coming in these days! First, I needed electricity. I discovered an old buried line from the house under part of the slab. I dug it out and used it for some rudimentary light and a single outlet so I could work outside. But it wasn't adequate for a workshop, nor was it safe, in my opinion. And since I had a shop planned in the basement of the house as well, I knew I would be digging a trench to feed the house with compressed air from my new 7 HP, 80-gallon air compressor. So I buried two lines of conduit alongside the air lines: one to carry power (100 amp service with 4 gauge wire) and one for phone and computer network hookups. Once everything was in the ground, I could get started on the rest of the garage. After roughing-in the rest of my electrical system, I insulated the walls with R-13 fiberglass, and the roof with R-19 fiberglass. I covered this with 1/2" OSB and painted it an industrial gray color (the cheapest paint I could find in a 5-gallon pail). It took two coats to cover the thirsty OSB, but I think it turned out really nicely. I installed outlets, ran conduit for all the light fixtures (a mixture of florescent and track lighting with spots because the florescents don't like the cold), and hung a new man door for access without opening the overhead door. I also wired for overhead fans and a pair of outdoor outlets for the driveway and back yard. I installed a new breaker panel with shut-offs for all the circuits, as well as a main shut-off switch for the compressor. I've broken this section up into 3 separate pages so you don't have to wait forever for them to load. Here's what my garage looked like:
Previous
Restoration Day E-mail me at toolman8@sbcglobal.net This page accessed Thanks, Fidget! |