What's up with this
banner thing?
If
you don't see a navigation bar on the left, CLICK HERE
|
|
|
December
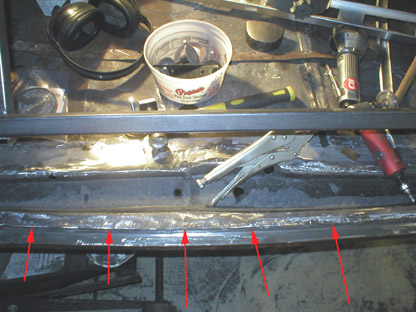
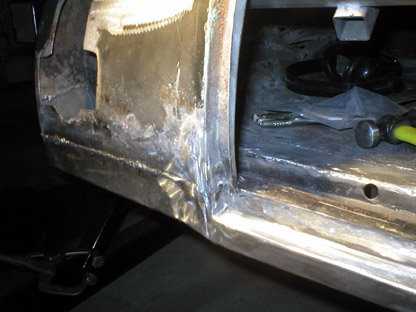
27, 2004 Trunk Work Part 13Wow, I survived the holidays! Here in Cleveland, the weather did everything it could to keep us inside, including 12 inches of snow on the 22nd, followed by 6 hours of pouring rain on the 23rd, then another 8-12 inches of snow and sub-20 degree temperatures ever since. Ever shoveled water? Trust me, it's heavy. I also survived my family and friends, and it makes me happy to have such great people around me. Some understand my hobby, most don't, but still ask the proper questions anyway. Tonight I finally got a chance to get back into the garage, which is still comfortably warm, thanks to the heater I installed last year. I'm glad to have it! Of course, I picked up where I left off... in the trunk. Before I can add the last two pieces of sheet metal and finally button it up, I had to finish the lip area. The first thing I did was weld the newly installed lip to the main brace and grind the edges smooth to create a sharp angle. This will create the bottom and back of the weatherstrip channel. A second piece of 16-gauge sheet metal will form the top of the channel and seal the rear brace area.
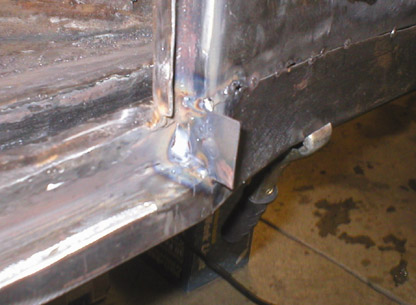
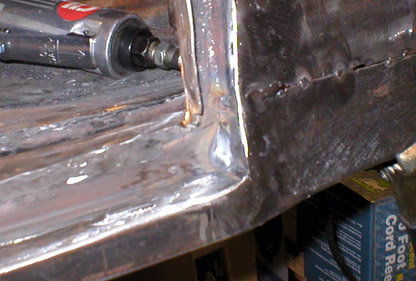
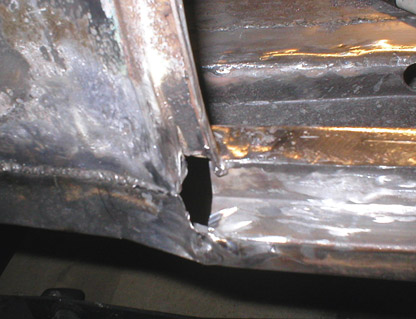
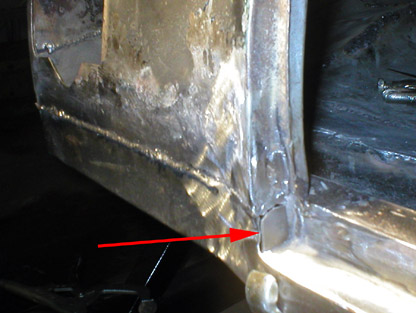
Once that was solid, I had two little areas to fill at the outer edges of the trunk lip. I cut patches from 16-gauge steel that was about the same thickness as the prefabricated lip I installed earlier. I welded all the corners and ground them smooth. I tried a new trick for grinding down welds: you know that I prefer to use the cut-off wheel to grind just the weld bead down to preserve the surrounding metal. I decided that it would be even more effective if I stacked two cut-off wheels to give a wider grinding surface. It works very well! Just make sure both wheels are exactly centered so they spin true.
The driver's side took two patches to fill--one that was a continuation of the prefabricated trunk lip panel so that it extended as far as the edge of the trunk opening, and the second was a filler similar to the one above. A little more grinding and the repair was complete.
Next up, I'll fabricate the top trunk lip and spot weld it in place, then a final panel over the rear brace to finish it all. Then some finish grinding and dressing of the welds, and it'll be as good as new. Then it'll go up on the rotisserie. One last thing: here's an ultra-cool holiday gift Julia and my mother somehow came up with:
Previous Restoration Day E-mail me at toolman8@sbcglobal.net This page accessed Thanks, Fidget! |