What's up with this
banner thing?
If
you don't see a navigation bar on the left, CLICK HERE
|
|
|
December
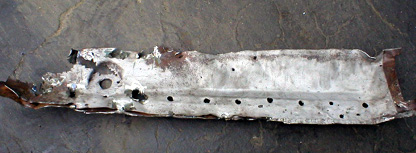
31, 2004 Trunk Work Part 14Well, here it is: the last entry of 2004. I wanted to finish the year by completing the trunk, but these things always take longer than one thinks. One more day should do it, though. The first project I tackled was finishing the trunk lip area. Originally there was a small sheet metal piece spot welded to the floor which formed the outer edge of the trunk and a channel for the rubber trunk seal. To add strength, the outer edge was folded over double. My first thought was to duplicate the factory technique, but making a fold along a curve is something that takes tools I don't have. My second choice was to use some 16-gauge steel sheet, which would be almost as thick as the 2 layers of 22 gauge they used originally. After a few tries, I realized that even the 16-gauge wasn't thick enough. Looking around my shop, I found a 2-inch wide chunk of steel that was about 1/16" thick. Perfect. I cut that piece to length, then used the original lip to trace a contour on the new steel. Since the original was hacked up and consisted of two welded pieces that didn't form a continuous arc, I kind of fudged it. I cut it out (here's where a band saw would be handy) and filed it to shape. Since this was such a visible part of the trunk, I took extra time to make sure the radius edges were smooth. Then I sanded it all with 220 grit to remove the filing scratches.
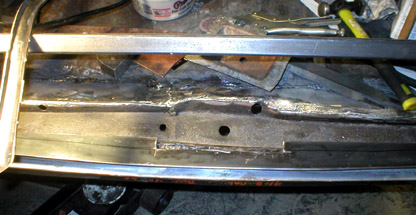
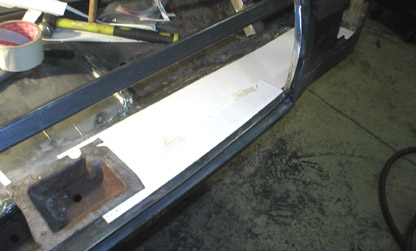
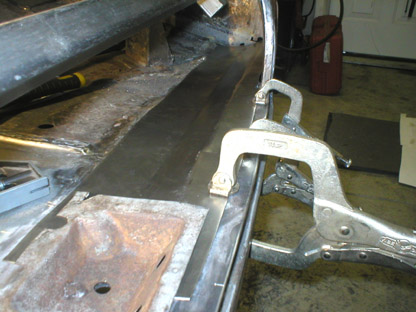
Once the lip was in place, I tack welded it to the brace in several locations and tacked it to the panel below. I'll fill the gap with seam sealer instead of welding it all the way across--that probably isn't necessary and will involve a lot of grinding and dressing to make it fit correctly later. Between the spot welds and the tack welds above, it won't be going anywhere. With the lip secured, it was time to fabricate the last panels--the top pieces that close up the brace area. To get a good working surface, I ground down all the welds between the new and old trunk floor, hammered them flat and dressed them with a sanding disc. Then I started making some cardboard templates for the final part. The original part was made in two pieces, so that's how I decided to do this one. Technically, they should be mirror-images of each other, so I made one template and checked it for fit on both sides. It fits around the latch trough and is spot welded to the trunk lip and the floor. It is also bent into a slight ramp shape to accommodate the rise of the rear of the trunk.
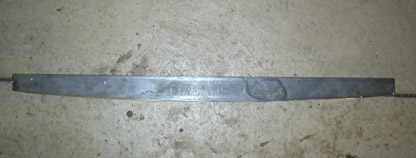
Satisfied with the template's fit (note that I cut it in a curve to match the trunk lip for a consistent 1/2" reveal), I cut it out of 20-gauge sheet. It fit very well, but it was clear that it needed to be folded slightly in two places. Take a look at the panel I removed a few months ago:
At this point, I really wish I had a sheet metal brake. Though I've been able to make acceptable bends until now, the bends I needed for this panel aren't as crisp as those in the original. That bugs me.
I'll make the other panel next time, paint the inside of the brace and underside of the panels with Zero-Rust, then seal it all up with some spot welds. And that will be the end of the trunk (for the moment, anyway). Previous Restoration Day E-mail me at toolman8@sbcglobal.net This page accessed Thanks, Fidget! |