What's up with this
banner thing?
If
you don't see a navigation bar on the left, CLICK HERE
|
|
|
September
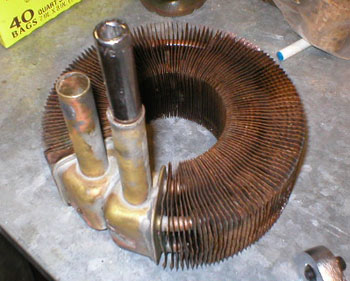
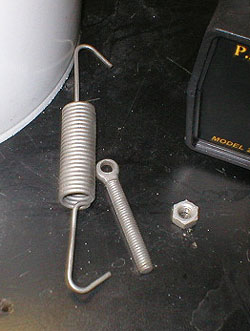
10, 2003 Defroster Core RepairMy radiator paint arrived from Eastwood this evening, so I wanted to try to reassemble the defroster assembly and put it on the shelf. But the core itself needed some attention before paint, so I took care of that first. You might recall that I promised to show you a trick for making bent and crushed heater feed tubes round again, and this is it: use progressively larger sockets gently tapped into the damaged tubing. On old cars, the OD of the socket should typically be 1 size smaller than the ID of the tubing--on my 1/2" tubing, I worked up to a 3/8" socket, which was a near-perfect fit.
Next, I reinforced the thin spots on the tanks that I believed were seeping. I got out the torch and solder and shored them up a bit. With metal this thin, you have to be careful not to heat up a very large area because solder in other places will start to run out and create more leaks, so I used a rosette. Also, I usually fill the core with water up to the point where I am working to act as a heat sink and help eliminate that problem. The repairs on the tanks went well, but then I noticed a hole in one of the feed tubes which needed immediate attention:
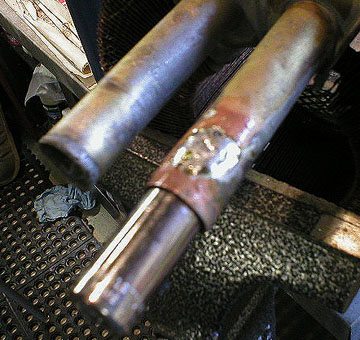
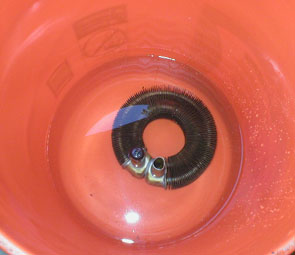
Since you can't weld these thin pieces of brass and copper because they would melt at welding temperatures, holes need to be soldered closed or pieces replaced entirely. The hole in the feed tube bothered me because it was going to be a high-stress area where the hoses would be attached, and I didn't want a catastrophic failure down the line. But I didn't feel like cutting the tube off, making a new one and soldering it onto the tank, which was probably overkill. Instead, I took a 3/8" socket and stuck it into the tube where it would act as a backer for the solder while it cooled and hardened. When it was about half cooled, I removed the socket and the repair was perfect. It should last without any problems as long as some gorilla doesn't crank down on the hose clamps again. After all, the car's cooling system only runs at 7 PSI--you don't need to tighten the hoses like you're trying to contain Old Faithful... Once everything had cooled to ambient temperature (this is important: don't throw hot metal into cold water--the thermal shock will crack the metal), I did a leak test by submerging the core in a bucket of water and pressurizing it with shop air and a rubber fitting I made to seal it. If bubbles came out, I would know there is still a leak. There were no bubbles, even at ~40 PSI. My repairs were holding.
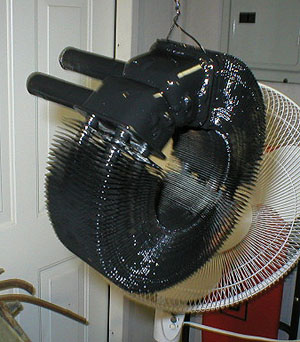
Once the core was dry, I blew it off
one final time with shop air, and painted it with the Eastwood
I also did some additional experimenting with my Cadmium plating kit, and I'm getting frustrated. Some parts come out perfect while others rust immediately. I have a hunch that my solution is contaminated. I have a few ideas for how to fix this, and I may switch to a larger container, since it is hard to work out of a bucket. But it sure is a pain to have something so apparently simple become so difficult. With my results being so inconsistent, it's hard to know what I'm doing wrong.
This weekend, I'm probably going to have to spend some time race prepping the Mustang--an associate from work has rented a track in Pennsylvania for the day, and invited me to join him and a few other people for a day of hot laps. Not being one to turn down open track sessions, I said, "Heck yes I'll be there!" That means the Mustang needs some extra attention. Right now, it's just fine for street duty, but on the track, you can't afford failures, so I make a habit of going over every important nut and bolt with a torque wrench just to be sure. I'll also swap out the exhaust system, brake pads and exchange the 50/50 coolant with distilled water for track use. Unfortunately, my race wheels and tires were stolen a few years ago after I stopped racing, and I don't plan on doing a lot of racing in the future, so for now, I'll be running on street rubber instead of the sticky stuff. I suppose that's just as well--this is just for fun, not competition, and the street tires will keep me out of trouble. It's no fun coming home with a bent car. Previous
Restoration Day E-mail me at toolman8@sbcglobal.net This page accessed Thanks, Fidget! |