What's up with this
banner thing?
If
you don't see a navigation bar on the left, CLICK HERE
|
|
|
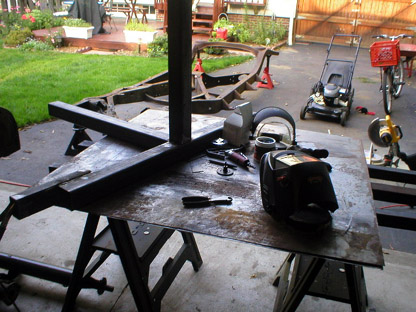
7/19/04 Rotisserie Construction Page 1 Page 2 Page 3 Page 4 Page 5 Page 6 Page 7 Page 8 Page 9 FINAL Update Once everything was where I wanted it, I set the entire assembly up on a makeshift welding table I set up in the shop. When doing any finish welding, I find it easier to position the work where I can make a flat weld at a comfortable level. Kneeling on a floor trying to make a weld work on a vertical surface is no way to get strong welds.
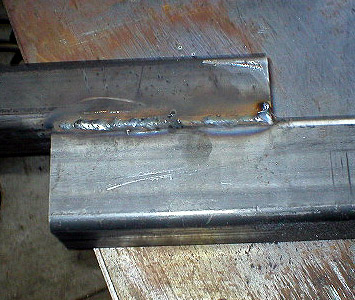
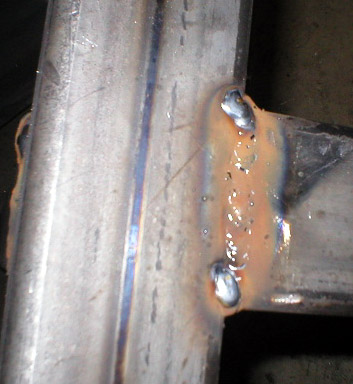
Welding thick metal is going to be a challenge with any "hobby" level welder, mine included. Though it says that it will weld 1/4" metal, it won't do it for long without overheating, so plan your welds accordingly and don't just keep going--make sure you pause occassionally to let the welder cool off. I typically put my tack welds in the middle of joints, then finish weld on each side to minimize the time I spend with the welder going full tilt. With such heavy metal, it isn't so critical to prevent heat build-up as it is with sheet metal, but if you are doing finish welds on one side of a piece with only a tack on the other, it is possible to pull the tack apart with the heat. Use caution and common sense.
Page 1 Page 2 Page 3 Page 4 Page 5 Page 6 Page 7 Page 8 Page 9 FINAL Update E-mail me at toolman8@sbcglobal.net This page accessed Thanks, Fidget! |